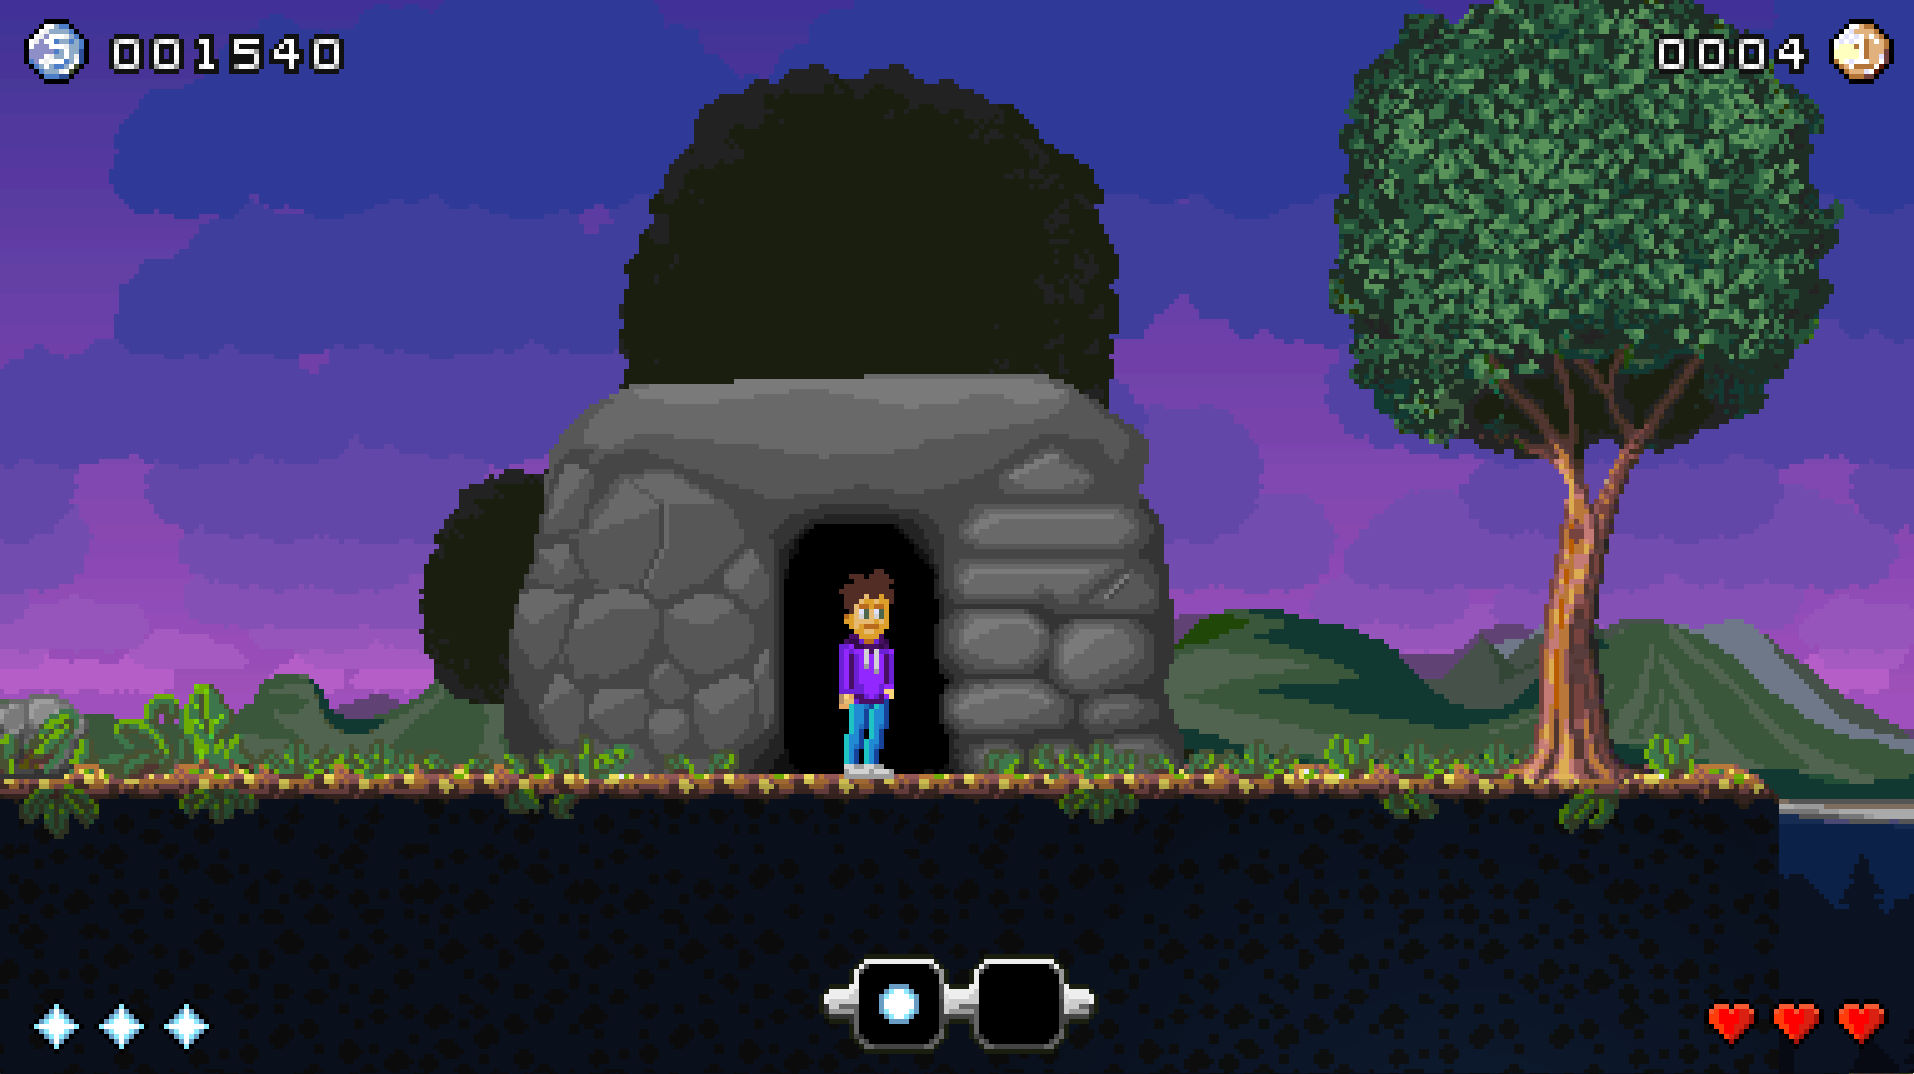
<?xml version="1.0" encoding="utf-8"?><feed xmlns="http://www.w3.org/2005/Atom" ><generator uri="https://jekyllrb.com/" version="3.10.0">Jekyll</generator><link href="http://blog.subspace.nl/feed.xml" rel="self" type="application/atom+xml" /><link href="http://blog.subspace.nl/" rel="alternate" type="text/html" /><updated>2026-03-26T10:16:54+00:00</updated><id>http://blog.subspace.nl/feed.xml</id><title type="html">Zeme’s Retro Blog</title><subtitle>A blog about the development of a vertically-scrolling shoot &apos;em up for the Atari ST.</subtitle><author><name>Sandor Drieënhuizen aka Zeme/Dawn</name></author><entry><title type="html">Switching to -mshort</title><link href="http://blog.subspace.nl/2026/03/26/mshort.html" rel="alternate" type="text/html" title="Switching to -mshort" /><published>2026-03-26T00:00:00+00:00</published><updated>2026-03-26T00:00:00+00:00</updated><id>http://blog.subspace.nl/2026/03/26/mshort</id><content type="html" xml:base="http://blog.subspace.nl/2026/03/26/mshort.html"><![CDATA[<p>I had wanted to do this for a while, but <a href="https://demozoo.org/sceners/2647">PeyloW</a>’s great <a href="https://atariscne.org/news/index.php/gcc-for-asm-experts-and-c-c-intermediates-part-2">post on Atariscne.org</a> pushed me to finally do it: I decided to update the game to the <code class="language-plaintext highlighter-rouge">-mshort</code> compiler flag.</p>

<p>The reason I wanted to switch to <code class="language-plaintext highlighter-rouge">-mshort</code> is that it allows for more efficient code generation on the 68000. Since that CPU has a 16-bit data bus, needlessly passing around 32-bit values on the stack is wasteful, causing additional CPU cycles to be spent.</p>

<p>By using <code class="language-plaintext highlighter-rouge">-mshort</code>, the compiler will default to word-length for integers (type <code class="language-plaintext highlighter-rouge">int</code>) and generate code that uses 16-bit values on the stack for those. Of course, you can still use <code class="language-plaintext highlighter-rouge">long</code> for 32-bit values when needed (by using the <code class="language-plaintext highlighter-rouge">long</code> type), but for many cases, such as loop counters or small offsets, using <code class="language-plaintext highlighter-rouge">int</code> is sufficient.</p>

<p>Besides performance gains, <code class="language-plaintext highlighter-rouge">-mshort</code> also allows for smaller code size.</p>

<h2 id="pitfalls">Pitfalls</h2>

<p>While this worked out quite well for my codebase, I encountered a few pitfalls.</p>

<p>For example, I had to switch libcmini to the <em>short</em> version as well, to make the calling conventions align between the two.</p>

<p>Also, I noticed that controlling fast-forward in Hatari using Natfeats didn’t work properly anymore. Whatever argument I passed (0, 1), it always proceeds to enable fast-forward.</p>

<blockquote>
  <p>Natfeats is a standard that is implemented by Hatari and it allows you to control certain aspects of the emulator, such as fast-forwarding, from your code. I use this to speed up the startup time of the game during testing, so I can quickly start playing. See <a href="http://clarets.org/steve/projects/20200831_atari_natfeats.html">Using Natfeats in 68000 Assembly Language</a> for more details on Natfeats.</p>
</blockquote>

<p>It turned out that for arguments, Natfeats expects long values on the stack, but with <code class="language-plaintext highlighter-rouge">-mshort</code>, a word is pushed onto the stack by my code so Hatari doesn’t find the correct value on the stack.</p>

<p>The reason that my code now pushes a word onto the stack was that the literal that was passed is by default an <code class="language-plaintext highlighter-rouge">int</code>, which is now word-length:</p>

<div class="language-c highlighter-rouge"><div class="highlight"><pre class="highlight"><code><span class="n">nfOps</span><span class="o">-&gt;</span><span class="n">call</span><span class="p">(</span><span class="n">fastForwardId</span><span class="p">,</span> <span class="mi">1</span><span class="p">);</span>
</code></pre></div></div>

<p>This was fixed by making the literal explicitly <code class="language-plaintext highlighter-rouge">long</code>:</p>

<div class="language-c highlighter-rouge"><div class="highlight"><pre class="highlight"><code><span class="n">nfOps</span><span class="o">-&gt;</span><span class="n">call</span><span class="p">(</span><span class="n">fastForwardId</span><span class="p">,</span> <span class="mi">1L</span><span class="p">);</span>
</code></pre></div></div>

<p>Also, I had to change</p>

<div class="language-c highlighter-rouge"><div class="highlight"><pre class="highlight"><code><span class="cp">#define HEIGHT 512
#define SCANLINE_BYTES 160
</span><span class="kt">long</span> <span class="n">offset</span> <span class="o">=</span> <span class="n">HEIGHT</span> <span class="o">*</span> <span class="n">SCANLINE_BYTES</span>
</code></pre></div></div>

<p>to:</p>

<div class="language-c highlighter-rouge"><div class="highlight"><pre class="highlight"><code><span class="cp">#define HEIGHT 512
#define SCANLINE_BYTES 160
</span><span class="kt">long</span> <span class="n">offset</span> <span class="o">=</span> <span class="p">(</span><span class="kt">long</span><span class="p">)</span><span class="n">HEIGHT</span> <span class="o">*</span> <span class="n">SCANLINE_BYTES</span>
</code></pre></div></div>

<p>Because, again, by default the constants are <code class="language-plaintext highlighter-rouge">int</code> and therefore words, causing the expression (512 * 160) to overflow.</p>

<p>I could have also written the following:</p>

<div class="language-c highlighter-rouge"><div class="highlight"><pre class="highlight"><code><span class="cp">#define HEIGHT 512L
#define SCANLINE_BYTES 160L
</span><span class="kt">long</span> <span class="n">offset</span> <span class="o">=</span> <span class="n">HEIGHT</span> <span class="o">*</span> <span class="n">SCANLINE_BYTES</span>
</code></pre></div></div>

<p>But I think this is less ideal, because now the constants are forced to be longs while in other places using them as words would suffice (i.e., when multiplying by a value that doesn’t cause an overflow).</p>

<p>Finally, I found that calling C library function <code class="language-plaintext highlighter-rouge">itoa</code> didn’t work for me anymore in certain cases. It turned out that I had to use <code class="language-plaintext highlighter-rouge">ltoa</code>, which explicitly takes a long argument. <code class="language-plaintext highlighter-rouge">itoa</code> had silently changed to take a word and I was passing in a long.</p>

<p>Depending on your code, you might encounter similar issues when switching to <code class="language-plaintext highlighter-rouge">-mshort</code>, so be sure to check the types of your literals and function arguments.</p>

<p>I’m sure there are many more pitfalls that may arise when switching to <code class="language-plaintext highlighter-rouge">-mshort</code>, but these are the ones I encountered so far.</p>

<h2 id="performance-gains">Performance gains</h2>

<p>Of course, all of this effort wouldn’t be worth it if it didn’t result in a significant performance gain.</p>

<p>I’m using a special mode for benchmarking, where the game runs for a short while without user interaction where everything that happens is deterministic. The benchmark then measures the number of CPU cycles spent. This allows me to reliably compare the performance of different versions of the code.</p>

<p>While not a very scientifically sound benchmark, it gives a good sense of the performance results:</p>

<div class="language-plaintext highlighter-rouge"><div class="highlight"><pre class="highlight"><code>Without -mshort
Average: 102337086 cycles

With -mshort
Average: 101441200 cycles
</code></pre></div></div>

<p>The average gain is <strong>0.875%</strong>.</p>

<p>Comparing the code size is a bit harder in this case because I’ve made some other changes as well, as a result of the <code class="language-plaintext highlighter-rouge">-mshort</code> change, which changed the code size slightly. But I can say that the resulting executable was about 1% smaller.</p>

<h2 id="conclusion">Conclusion</h2>

<p>I must admit that I hoped for a bit more but it was relatively easy to achieve, so I’m happy with it.</p>

<p>Of course the result depends a lot on the codebase and mine already has quite a few assembly-based optimizations in place for tight loops with function calls, which otherwise could benefit from <code class="language-plaintext highlighter-rouge">-mshort</code> as well.</p>]]></content><author><name>Sandor Drieënhuizen aka Zeme/Dawn</name></author><summary type="html"><![CDATA[I had wanted to do this for a while, but PeyloW’s great post on Atariscne.org pushed me to finally do it: I decided to update the game to the -mshort compiler flag.]]></summary></entry><entry><title type="html">Sync scrolling</title><link href="http://blog.subspace.nl/2026/03/18/sync-scrolling.html" rel="alternate" type="text/html" title="Sync scrolling" /><published>2026-03-18T00:00:00+00:00</published><updated>2026-03-18T00:00:00+00:00</updated><id>http://blog.subspace.nl/2026/03/18/sync-scrolling</id><content type="html" xml:base="http://blog.subspace.nl/2026/03/18/sync-scrolling.html"><![CDATA[<p>As you may know, the Atari ST (unlike the STE) officially doesn’t support hardware scrolling. In this post, I’m going to talk about a demoscene technique that allows an ST to achieve basic <em>hardware scrolling</em> regardless of that restriction. This technique is called <em>sync scrolling</em>.</p>

<blockquote>
  <p>In case you’re wondering: sync scrolling refers to the fact that it is implemented using beam synchronization techniques, which I’ll explain later.</p>
</blockquote>

<p><a href="https://demozoo.org/sceners/52924">Dyno</a> wrote this great <a href="https://aldabase.com/atari-st-fullscreen-demos-history">Atari ST Fullscreen demos history</a> post on his site, which I urge you to read first because it also touches on the topic of sync scrolling and how it evolved over time.</p>

<p>Before I went on to use sync scrolling, I had been using a rather narrow playfield (much like <a href="https://en.wikipedia.org/wiki/Xenon_(video_game)">Xenon</a> did) to be able to maintain an acceptable framerate. But I kept thinking that it could be done better. I wanted a bigger playfield while spending fewer CPU cycles drawing it at the same time. I knew about sync scrolling from back in the day, when quite a few demos used the technique. So, I figured I could try to use sync scrolling to achieve that goal by not having to redraw the entire screen each cycle.</p>

<h2 id="hardware-scrolling">Hardware scrolling</h2>

<p>Before we dive into sync scrolling, let’s first talk about hardware scrolling. Hardware scrolling in its simplest form means that the memory address where video hardware starts reading graphics from can be adjusted with a sufficient degree of precision to achieve smooth scrolling in at least one direction. This means that there is no actual moving of graphics in RAM involved in hardware scrolling.</p>

<p>This is my own definition of hardware scrolling. I’m sure there are alternative ones, but this definition suits our needs in this context.</p>

<h2 id="sync-scrolling">Sync scrolling</h2>

<p>So, we’ve already established that sync scrolling is a form of hardware scrolling. However, sync scrolling is a bit more restricted than traditional hardware scrolling.</p>

<p>Although the video address can be changed on the ST, it can only be changed in steps of 256 bytes, which results in 8-line granularity. This is because a scanline on the ST is always <code class="language-plaintext highlighter-rouge">160</code> bytes long and <code class="language-plaintext highlighter-rouge">8 * 160 = 1280</code> is the first number that is a multiple of 256. For smooth scrolling at a reasonable pace, such granularity is not sufficient because scrolling the screen by 8 lines each cycle is way too fast for most purposes. With sync scrolling on the ST we get vertical scrolling with 1-scanline precision and horizontal scrolling with 16-pixel precision. For this game, which scrolls vertically only, the horizontal precision is of no concern.</p>

<blockquote>
  <p>There’s also a technique that allows for 4-pixel horizontal precision, but sadly, it is not compatible with all ST(E) models and wakestates. I’ll refer to wakestates later in this post.</p>
</blockquote>

<p>Besides changing the video address, some hardware platforms (like the STE or the Commodore Amiga) provide additional features, such as 1-pixel horizontal offset precision and configurable line lengths (allowing for virtual screens with horizontal screen wrapping), but that is not the case for sync scrolling on the ST.</p>

<p>With this knowledge, I wanted to see if I could implement sync scrolling in my game. I posted <a href="https://www.atari-forum.com/viewtopic.php?t=45351">a question on atari-forum.com</a>, asking what the best sync scroll routine was. Unsurprisingly, <a href="https://demozoo.org/sceners/2443">Troed</a> (member of the aptly named demoscene group <a href="https://demozoo.org/groups/2256">SYNC</a>) was quick to reply and offer his help. For those who don’t know him, Troed is famous for his knowledge of Atari ST video synchronization tricks, and he has also released very impressive demos such as <a href="https://www.youtube.com/watch?v=w1h-LmqgGZU">Closure</a>, taking the concept of implementing effects previously thought impossible on an ST to an extreme.</p>

<p>After a few weeks of hard work and exchanging ideas and questions with Troed, I finally managed to get sync scrolling working in my game.</p>

<blockquote>
  <p>There were some rough edges to the sync scroll routines that had me puzzled a few times, but Troed was always there to help me out.</p>
</blockquote>

<p>Further below, I will explain how I implemented sync scrolling in the game, but first, let’s investigate how sync scrolling actually works.</p>

<h2 id="so-how-does-it-work">So how does it work?</h2>

<p>Technically, sync scrolling works by tricking the GLUE chip into generating lines of various lengths, which in turn causes the MMU to read more or less graphics memory for those lines. This must be done before the point where graphics start being read (i.e., somewhere in the upper border). We’ll call the amount of graphics being read for a scanline <em>line length</em> from now on. Changing line lengths causes the graphics for the remaining scanlines to be shifted.</p>

<blockquote>
  <p>If you want to know more about the timing characteristics of the state machines inside the GLUE and Shifter chips, check out <a href="https://www.atari-wiki.com/?title=ST_STE_Scanlines">this excellent article</a>.</p>
</blockquote>

<p>The scanline length manipulation is achieved by switching between monochrome, 50Hz, and 60Hz modes at exactly timed moments during the scanline.</p>

<p>The change of line length causes the graphics for the remaining scanlines to be shifted accordingly. This, by itself, however, is not sufficient to achieve the granularity we need because only twelve different line lengths can be achieved.</p>

<p>But by repeating this process during several consecutive scanlines, several different line lengths can be combined to achieve every total graphics offset required for a 2-byte granularity.</p>

<blockquote>
  <p>A two-byte video address granularity in practice means a granularity of 16 pixels because of the way video memory is laid out using bitplanes.</p>
</blockquote>

<p>Finding the correct combination of line lengths to achieve the desired total graphics offset is not trivial. Fortunately, Troed has created the <a href="https://codeberg.org/troed/synctable">synctable tool</a> which allows us to generate a table of line length combinations that suits our needs (vertical scrolling with 1-scanline precision in our case).</p>

<h3 id="limitations">Limitations</h3>

<p>One effect of using sync lines is that graphics on those lines will look distorted. This problem can be solved by blanking the sync lines by setting the palette to all-black during the lines. However, the result is that there are a few fewer scanlines available for display.</p>

<p>Fortunately, this can be mitigated by using an overscan demoscene technique (in particular, opening the upper and/or lower borders) to regain and even extend the number of scanlines that display graphics.</p>

<p>The following diagram illustrates how the top border can be used to regain scanlines for graphics when using sync scrolling.</p>

<p><img src="../../../assets/img/posts/2026-03-18-sync-scrolling/Borders.png" alt="Diagram" /></p>

<p>However, I will ignore this technique for the remainder of this post to keep things relatively simple.</p>

<p>Another aspect to keep in mind is that when the sync lines are active, timing must be fully predictable. This means that no interrupts must occur. This rules out the use of timers as well. So for example, music that uses timers to achieve SID sound effects cannot be used.</p>

<p>Finally, the timing of the sync lines depends on the actual hardware. As explained in the <a href="https://www.atari-wiki.com/?title=ST_STE_Scanlines#'Wakestates'_and_Phase">article mentioned above</a>, there are different possible wakestates across hardware and across boots. A different wakestate often means that timings are different as well, so the code needs to compensate for this. The hardware dependency also means that sync scrolling will not work on non-compatible hardware, such as the Mega STE (running at 16 MHz and having a cache), the TT or the Falcon. Also, accelerated hardware will probably not work because of different timings. Fortunately, the regular STE is supported.</p>

<h3 id="implementation">Implementation</h3>

<p>Let’s dive into some of the details of how I implemented sync scrolling in the game.</p>

<blockquote>
  <p>This section is rather technical, so feel free to skip it if you’re not interested in the details.</p>
</blockquote>

<p>As I described in the <a href="/2026/02/27/technical-design.html">Technical design</a> post, I’m using two libraries to implement sync scrolling:</p>

<ul>
  <li><a href="https://codeberg.org/troed/WSDETECT">Wakestate detector</a>
    <ul>
      <li>Used to properly initialize the wakestate for the actual hardware.</li>
    </ul>
  </li>
  <li><a href="https://codeberg.org/troed/SYNC-scroll">Sync scrolling library</a>
    <ul>
      <li>Contains the actual sync logic.</li>
    </ul>
  </li>
</ul>

<p>Basically, I’m using these libraries to set the video address with 2-byte granularity synchronized to each VBL<sup id="fnref:1" role="doc-noteref"><a href="#fn:1" class="footnote" rel="footnote">1</a></sup>. For this to work, a bit of setup is required, which I’ll explain below.</p>

<p>The Sync scrolling library expects the following:</p>
<ul>
  <li>A table of line length combinations for each possible scroll offset.</li>
  <li>A video address with <code class="language-plaintext highlighter-rouge">256</code> byte granularity.</li>
  <li>A scroll offset in bytes to further adjust the video address.</li>
</ul>

<p>Once we have initialized the Sync scroll library with the table, we can use the following flow to handle sync scrolling during each frame:</p>

<pre class="mermaid">
sequenceDiagram
    autonumber
    activate Main loop
    Main loop-&gt;&gt;Main loop: Update video memory
    Main loop-&gt;&gt;+Vsync: Call
    Vsync-&gt;&gt;Vsync: Wait for sync line routines to complete 
    Vsync-&gt;&gt;Vsync: Set up video address + scroll offset
    Vsync-&gt;&gt;VBL: Wait for VBL
    Main loop-&gt;&gt;+VBL: VBL interrupt
    VBL-&gt;&gt;VBL: Set up Timer A
    VBL-&gt;&gt;VBL: Blank out palette
    VBL-&gt;&gt;-Vsync: Confirm VBL
    Vsync--&gt;&gt;-Main loop: Return
    deactivate Main loop
    Main loop-&gt;&gt;+Timer A: Timer A interrupt
    Timer A-&gt;&gt;Timer A: Wait for MMU to start reading graphics
    Timer A-&gt;&gt;Timer A: Sync lock
    Timer A-&gt;&gt;Timer A: Wait (n) cycles
    Timer A-&gt;&gt;Timer A: Execute sync line routines
    Timer A-&gt;&gt;-Timer A: Restore palette
</pre>

<p>To elaborate on each step in the flow above:</p>

<ol>
  <li>The <em>main loop</em> <strong>updates video memory</strong> for the current frame. It may also perform other logic, such as updating the positions of sprites, checking for collisions, etc.</li>
  <li>The <em>main loop</em> <strong>calls the Vsync routine</strong> before continuing to process the next frame.</li>
  <li>The <em>Vsync</em> routine <strong>waits for the sync line routines to complete</strong>, if they haven’t already. This is important because the sync line routines must only be set up for the next frame, not the current.</li>
  <li>The <em>Vsync</em> routine <strong>sets up the video address and scroll offset</strong> in the Sync scrolling library for the next frame.</li>
  <li>The <em>Vsync</em> routine <strong>waits for the next VBL interrupt</strong> to occur.</li>
  <li>The <em>VBL</em> interrupt <strong>occurs</strong>.</li>
  <li>The <em>VBL</em> interrupt handler <strong>sets up Timer A</strong> to occur right before the moment when the MMU starts reading graphics. Using a timer saves CPU cycles in contrast to waiting in a loop.</li>
  <li>The <em>VBL</em> interrupt handler <strong>blanks out the palette</strong> to hide the sync lines.</li>
  <li>The <em>VBL</em> interrupt handler <strong>confirms the VBL</strong> to the Vsync routine by setting a flag.</li>
  <li>The <em>Vsync</em> routine <strong>confirms the VBL</strong> to the game loop by returning the call.</li>
  <li>The <em>Timer A</em> interrupt <strong>occurs</strong>.</li>
  <li>The <em>Timer A</em> interrupt handler <strong>waits for the MMU</strong> to start reading graphics.</li>
  <li>The <em>Timer A</em>  interrupt handler <strong>performs a sync lock</strong> to ensure that an exact number of cycles has passed since the MMU started reading graphics.</li>
  <li>The <em>Timer A</em>  interrupt handler <strong>waits for a specific number of CPU cycles</strong> to reach the exact moment when the sync line routines need to be executed.</li>
  <li>The <em>Timer A</em>  interrupt handler <strong>executes the sync line routines</strong>.</li>
  <li>The <em>Timer A</em>  interrupt handler <strong>restores the palette</strong> to make the graphics visible again.</li>
</ol>

<h3 id="the-sync-line-combination-table">The sync line combination table</h3>

<p>Before we can initialize the Sync scroll library, we need to generate the line length combination table that it needs. This can be done by running the <a href="https://codeberg.org/troed/synctable">synctable tool</a> with <code class="language-plaintext highlighter-rouge">VERTICAL160</code> set to <code class="language-plaintext highlighter-rouge">true</code> (to indicate our interest in vertical scrolling only).</p>

<div class="language-plaintext highlighter-rouge"><div class="highlight"><pre class="highlight"><code>./Synctables 
Calculating 1 lines of 12 combinations
Press Enter to increase number of lines, ESC+Enter to stop searching
Total searchspace: 12 calculations
Evaluating combos
Position 160 found, 127 combos missing, 8% searched
[...]
Position 206 found, 116 combos missing, 100% searched
Calculating 2 lines of 12 combinations
Press Enter to increase number of lines, ESC+Enter to stop searching
Total searchspace: 144 calculations
Evaluating combos
Position 64 found, 127 combos missing, 0% searched
[...]
Position 156 found, 79 combos missing, 100% searched
Calculating 3 lines of 12 combinations
Press Enter to increase number of lines, ESC+Enter to stop searching
Total searchspace: 1728 calculations
Evaluating combos
Position 224 found, 127 combos missing, 0% searched
[...]
Position 46 found, 22 combos missing, 90% searched
Vertical scroll possible, offset: 4
[...]
</code></pre></div></div>

<p>The tool then shows the following generated assembly code, which is intended to be included in the codebase:</p>

<div class="language-m68k highlighter-rouge"><div class="highlight"><pre class="highlight"><code><span class="c1">*********************************************</span>
<span class="c1">*  Sync scroll table creator by Troed/SYNC  *</span>
<span class="c1">*  12 line lengths used                     *</span>
<span class="c1">*********************************************</span>
<span class="c1">* Columns as indexes into line-rout table. Last value is 256 byte offset</span>
<span class="nl">_linsrc:</span> <span class="kt">dc</span><span class="nd">.l </span><span class="nv">_s160</span><span class="p">,</span><span class="nv">_s162</span><span class="p">,</span><span class="nv">_s230</span><span class="p">,</span><span class="nv">_s184</span><span class="p">,</span><span class="nv">_s204</span><span class="p">,</span><span class="nv">_s0</span><span class="p">,</span><span class="nv">_s54</span><span class="p">,</span><span class="nv">_s56</span><span class="p">,</span><span class="nv">_s80</span><span class="p">,</span><span class="nv">_s158</span><span class="p">,</span><span class="nv">_s186</span><span class="p">,</span><span class="nv">_s206</span>
<span class="nl">_synctab:</span>
    <span class="kt">dc</span><span class="nd">.b </span><span class="mi">5</span><span class="p">,</span><span class="mi">5</span><span class="p">,</span><span class="mi">5</span><span class="p">,</span><span class="mi">0</span>        <span class="c1">; 0 (0)</span>
    <span class="kt">dc</span><span class="nd">.b </span><span class="mi">2</span><span class="p">,</span><span class="mi">2</span><span class="p">,</span><span class="mi">6</span><span class="p">,</span><span class="mi">2</span>        <span class="c1">; 2 (514)</span>
    <span class="kt">dc</span><span class="nd">.b </span><span class="mi">2</span><span class="p">,</span><span class="mi">2</span><span class="p">,</span><span class="mi">7</span><span class="p">,</span><span class="mi">2</span>        <span class="c1">; 4 (516)</span>
    <span class="kt">dc</span><span class="nd">.b </span><span class="mi">5</span><span class="p">,</span><span class="mi">7</span><span class="p">,</span><span class="mi">11</span><span class="p">,</span><span class="mi">1</span>       <span class="c1">; 6 (262)</span>
    <span class="kt">dc</span><span class="nd">.b </span><span class="mi">3</span><span class="p">,</span><span class="mi">5</span><span class="p">,</span><span class="mi">8</span><span class="p">,</span><span class="mi">1</span>        <span class="c1">; 8 (264)</span>
    <span class="kt">dc</span><span class="nd">.b </span><span class="mi">0</span><span class="p">,</span><span class="mi">4</span><span class="p">,</span><span class="mi">9</span><span class="p">,</span><span class="mi">2</span>        <span class="c1">; 10 (522)</span>
    <span class="kt">dc</span><span class="nd">.b </span><span class="mi">0</span><span class="p">,</span><span class="mi">0</span><span class="p">,</span><span class="mi">4</span><span class="p">,</span><span class="mi">2</span>        <span class="c1">; 12 (524)</span>
    <span class="kt">dc</span><span class="nd">.b </span><span class="mi">0</span><span class="p">,</span><span class="mi">0</span><span class="p">,</span><span class="mi">11</span><span class="p">,</span><span class="mi">2</span>       <span class="c1">; 14 (526)</span>
    <span class="kt">dc</span><span class="nd">.b </span><span class="mi">0</span><span class="p">,</span><span class="mi">1</span><span class="p">,</span><span class="mi">11</span><span class="p">,</span><span class="mi">2</span>       <span class="c1">; 16 (528)</span>
    <span class="kt">dc</span><span class="nd">.b </span><span class="mi">0</span><span class="p">,</span><span class="mi">3</span><span class="p">,</span><span class="mi">10</span><span class="p">,</span><span class="mi">2</span>       <span class="c1">; 18 (530)</span>
    <span class="kt">dc</span><span class="nd">.b </span><span class="mi">0</span><span class="p">,</span><span class="mi">10</span><span class="p">,</span><span class="mi">10</span><span class="p">,</span><span class="mi">2</span>      <span class="c1">; 20 (532)</span>
    <span class="kt">dc</span><span class="nd">.b </span><span class="mi">1</span><span class="p">,</span><span class="mi">10</span><span class="p">,</span><span class="mi">10</span><span class="p">,</span><span class="mi">2</span>      <span class="c1">; 22 (534)</span>
    <span class="kt">dc</span><span class="nd">.b </span><span class="mi">0</span><span class="p">,</span><span class="mi">0</span><span class="p">,</span><span class="mi">0</span><span class="p">,</span><span class="mi">0</span>        <span class="c1">; 24 not found</span>
    <span class="kt">dc</span><span class="nd">.b </span><span class="mi">0</span><span class="p">,</span><span class="mi">0</span><span class="p">,</span><span class="mi">0</span><span class="p">,</span><span class="mi">0</span>        <span class="c1">; 26 not found</span>
    <span class="kt">dc</span><span class="nd">.b </span><span class="mi">2</span><span class="p">,</span><span class="mi">2</span><span class="p">,</span><span class="mi">8</span><span class="p">,</span><span class="mi">2</span>        <span class="c1">; 28 (540)</span>
    <span class="kt">dc</span><span class="nd">.b </span><span class="mi">2</span><span class="p">,</span><span class="mi">5</span><span class="p">,</span><span class="mi">7</span><span class="p">,</span><span class="mi">1</span>        <span class="c1">; 30 (286)</span>
    <span class="kt">dc</span><span class="nd">.b </span><span class="mi">0</span><span class="p">,</span><span class="mi">0</span><span class="p">,</span><span class="mi">0</span><span class="p">,</span><span class="mi">0</span>        <span class="c1">; 32 not found</span>
    <span class="kt">dc</span><span class="nd">.b </span><span class="mi">2</span><span class="p">,</span><span class="mi">9</span><span class="p">,</span><span class="mi">9</span><span class="p">,</span><span class="mi">2</span>        <span class="c1">; 34 (546)</span>
    <span class="kt">dc</span><span class="nd">.b </span><span class="mi">0</span><span class="p">,</span><span class="mi">2</span><span class="p">,</span><span class="mi">9</span><span class="p">,</span><span class="mi">2</span>        <span class="c1">; 36 (548)</span>
    <span class="kt">dc</span><span class="nd">.b </span><span class="mi">0</span><span class="p">,</span><span class="mi">0</span><span class="p">,</span><span class="mi">2</span><span class="p">,</span><span class="mi">2</span>        <span class="c1">; 38 (550)</span>
    <span class="kt">dc</span><span class="nd">.b </span><span class="mi">0</span><span class="p">,</span><span class="mi">1</span><span class="p">,</span><span class="mi">2</span><span class="p">,</span><span class="mi">2</span>        <span class="c1">; 40 (552)</span>

    <span class="c1">; ...for brevity, some rows are omitted...</span>
    
    <span class="kt">dc</span><span class="nd">.b </span><span class="mi">0</span><span class="p">,</span><span class="mi">5</span><span class="p">,</span><span class="mi">8</span><span class="p">,</span><span class="mi">0</span>        <span class="c1">; 240 (240)</span>
    <span class="kt">dc</span><span class="nd">.b </span><span class="mi">1</span><span class="p">,</span><span class="mi">5</span><span class="p">,</span><span class="mi">8</span><span class="p">,</span><span class="mi">0</span>        <span class="c1">; 242 (242)</span>
    <span class="kt">dc</span><span class="nd">.b </span><span class="mi">3</span><span class="p">,</span><span class="mi">9</span><span class="p">,</span><span class="mi">9</span><span class="p">,</span><span class="mi">1</span>        <span class="c1">; 244 (500)</span>
    <span class="kt">dc</span><span class="nd">.b </span><span class="mi">0</span><span class="p">,</span><span class="mi">3</span><span class="p">,</span><span class="mi">9</span><span class="p">,</span><span class="mi">1</span>        <span class="c1">; 246 (502)</span>
    <span class="kt">dc</span><span class="nd">.b </span><span class="mi">0</span><span class="p">,</span><span class="mi">0</span><span class="p">,</span><span class="mi">3</span><span class="p">,</span><span class="mi">1</span>        <span class="c1">; 248 (504)</span>
    <span class="kt">dc</span><span class="nd">.b </span><span class="mi">0</span><span class="p">,</span><span class="mi">0</span><span class="p">,</span><span class="mi">10</span><span class="p">,</span><span class="mi">1</span>       <span class="c1">; 250 (506)</span>
    <span class="kt">dc</span><span class="nd">.b </span><span class="mi">0</span><span class="p">,</span><span class="mi">1</span><span class="p">,</span><span class="mi">10</span><span class="p">,</span><span class="mi">1</span>       <span class="c1">; 252 (508)</span>
    <span class="kt">dc</span><span class="nd">.b </span><span class="mi">1</span><span class="p">,</span><span class="mi">1</span><span class="p">,</span><span class="mi">10</span><span class="p">,</span><span class="mi">1</span>       <span class="c1">; 254 (510)</span>
</code></pre></div></div>

<p>It concludes with the following message:</p>
<div class="language-plaintext highlighter-rouge"><div class="highlight"><pre class="highlight"><code>3 lines needed for the sync scroll
</code></pre></div></div>

<h4 id="understanding-the-synctable-tool-output">Understanding the synctable tool output</h4>

<p>There are a few takeaways from the output of the synctable tool:</p>
<ul>
  <li>The <code class="language-plaintext highlighter-rouge">_linsrc</code> table contains pointers to the sync line routines that the entries in <code class="language-plaintext highlighter-rouge">_synctab</code> can choose from.</li>
  <li>
    <p>The <code class="language-plaintext highlighter-rouge">_synctab</code> table contains the line length combinations for each possible scroll offset in the following format:</p>

    <p><code class="language-plaintext highlighter-rouge">dc.b L1[,L2..],O256 ; B (TO)</code></p>

    <p>where:</p>
    <ul>
      <li><code class="language-plaintext highlighter-rouge">L1</code>, <code class="language-plaintext highlighter-rouge">L2</code>, etc. are the line routine selection in the <code class="language-plaintext highlighter-rouge">_linsrc</code> table.</li>
      <li><code class="language-plaintext highlighter-rouge">O256</code> is the multiple of <code class="language-plaintext highlighter-rouge">256</code> that we need to subtract from the video address.</li>
      <li><code class="language-plaintext highlighter-rouge">B</code> is the desired number of bytes that the row aims to represent as a combination of line lengths. If the row contains all zeros, it means that there is no line length combination possible for the corresponding value.</li>
      <li><code class="language-plaintext highlighter-rouge">TO</code> is the total offset in bytes that this line length combination achieves. The final number indicates the number of 256 byte steps the video memory address has to be subtracted to reach the value of <code class="language-plaintext highlighter-rouge">B</code>.</li>
    </ul>
  </li>
  <li>
    <p>The <code class="language-plaintext highlighter-rouge">3 lines needed for the sync scroll</code> message.</p>

    <p>This can be observed in the <code class="language-plaintext highlighter-rouge">_synctab</code> table rows, which contain 4 values, one for each of the <code class="language-plaintext highlighter-rouge">3</code> entries and one for the 256 byte offset.</p>
  </li>
  <li>
    <p>The <code class="language-plaintext highlighter-rouge">Vertical scroll possible, offset: 4</code> message.</p>

    <p>It means that the graphics stored in memory should be offset by <code class="language-plaintext highlighter-rouge">4</code> bytes relative to the actual video address. This may seem strange, but it allows the offsets in the <code class="language-plaintext highlighter-rouge">_synctab</code> table to align correctly to obtain the desired offsets. If this offset was not applied, some of the scroll offsets that we need would align with rows in the <code class="language-plaintext highlighter-rouge">_synctab</code> table that have no possible line-length combination (as indicated by <code class="language-plaintext highlighter-rouge">not found</code>).</p>
  </li>
</ul>

<p>The following example shows how the Sync scrolling library calculates the effective video address to set in hardware and select the correct sync line routines to use to achieve the desired scroll offset that is fed into the Sync scrolling library.</p>

<p>Let’s say we want to offset the screen by 5 scanlines.</p>

<ul>
  <li>The offset in bytes is <code class="language-plaintext highlighter-rouge">5 * 160 = 800</code> bytes.</li>
  <li>We add the graphics offset of <code class="language-plaintext highlighter-rouge">4</code> bytes that the synctable tool advised us to apply, which gives us a total offset of <code class="language-plaintext highlighter-rouge">804</code> bytes.</li>
  <li>We use the regular way of setting the video memory address as close as we can get, by rounding down the offset to the nearest multiple of <code class="language-plaintext highlighter-rouge">256</code> which is <code class="language-plaintext highlighter-rouge">768</code>.</li>
  <li>The remainder is <code class="language-plaintext highlighter-rouge">36</code> which is what we use to accomplish the sync scroll.</li>
  <li>Looking up <code class="language-plaintext highlighter-rouge">36</code> in <code class="language-plaintext highlighter-rouge">_synctab</code>, we see that we need to use the line length combinations <code class="language-plaintext highlighter-rouge">0</code>, <code class="language-plaintext highlighter-rouge">2</code> and <code class="language-plaintext highlighter-rouge">9</code> (corresponding to line lengths of <code class="language-plaintext highlighter-rouge">160</code>, <code class="language-plaintext highlighter-rouge">230</code> and <code class="language-plaintext highlighter-rouge">158</code> bytes respectively), and then subtract <code class="language-plaintext highlighter-rouge">2 * 256 = 512</code> bytes from the video memory address.</li>
  <li>The scroll offset can be verified by summing these offsets: <code class="language-plaintext highlighter-rouge">160 + 230 + 158 - 512 = 36</code>.</li>
</ul>

<h3 id="initialization">Initialization</h3>

<p>Now that we have the line length combination table, we can initialize the Sync scroll library.</p>

<p>First, a call to the Wakestate detect library needs to be made, so we can properly initialize the wakestate in the Sync scroll library.</p>

<div class="language-m68k highlighter-rouge"><div class="highlight"><pre class="highlight"><code>    <span class="c1">; Wait for vertical blank (code omitted for brevity)</span>
    <span class="c1">; ...</span>
    
    <span class="k">jsr</span>     <span class="nv">_detect_ws</span>
</code></pre></div></div>

<p>Next, a call to the Sync scroll library needs to be made to properly initialize the wakestate.</p>

<div class="language-m68k highlighter-rouge"><div class="highlight"><pre class="highlight"><code>    <span class="k">jsr</span>     <span class="nv">_ws_patch</span>
</code></pre></div></div>

<p>And finally, to further set up the sync scroll library:</p>

<div class="language-m68k highlighter-rouge"><div class="highlight"><pre class="highlight"><code>    <span class="k">jsr</span>     <span class="nv">_ssinit</span>
</code></pre></div></div>

<h3 id="display-cycle">Display cycle</h3>

<p>Now that the Sync scrolling library is initialized, let’s take a look at what needs to happen every display cycle to make sync scrolling work.</p>

<p>We’ll need the video address (with <code class="language-plaintext highlighter-rouge">256</code> byte granularity) and the scroll offset. These must be calculated each screen refresh based on the current scroll position of the game.</p>

<p>Let’s see some code that illustrates how the Vsync routine, the VBL handler and the Timer A handler can be implemented to achieve sync scrolling.</p>

<blockquote>
  <p>The code shown here is not the actual code used in the game but rather a simplified version that is intended to illustrate the concepts. I have not tested it as such, so there may be some errors in it. Please let me know in the comments below if you find any issues.</p>
</blockquote>

<p>First, there’s the Vsync routine.</p>

<div class="language-m68k highlighter-rouge"><div class="highlight"><pre class="highlight"><code><span class="c1">;----------------------------------------------------------------------------------------------</span>
<span class="c1">; Waits for the next VBL interrupt to occur.</span>
<span class="c1">;----------------------------------------------------------------------------------------------</span>
<span class="nl">vsync:</span>  
        
<span class="nl">.waitLines:</span>
        <span class="k">tst</span><span class="nd">.b </span>  <span class="nv">lineRoutsFinished</span>               <span class="c1">; Wait for the line routs to complete</span>
        <span class="k">beq</span><span class="nd">.s </span>  <span class="p">.</span><span class="nv">waitLines</span>                      <span class="c1">; if they haven't finished yet.</span>

        <span class="c1">; Update the sync-scroll.</span>

        <span class="k">move</span><span class="nd">.l </span> <span class="nv">videoBase</span><span class="p">,</span><span class="nv">_hscrladr</span>
        <span class="k">move</span><span class="nd">.l </span> <span class="nv">scrollOffset</span><span class="p">,</span><span class="nb">d0</span>                  
        <span class="k">add</span><span class="nd">.l </span>  <span class="nd">#</span><span class="mi">4</span><span class="p">,</span><span class="nb">d0</span>                           <span class="c1">; Add the graphics offset (as advised</span>
                                                <span class="c1">; by the sync table tool).</span>
        <span class="k">move</span><span class="nd">.l </span> <span class="nb">d0</span><span class="p">,</span><span class="nv">_hscrloff</span>

        <span class="k">jsr</span>     <span class="nv">_setscr</span>                         <span class="c1">; This routine updates the shifter</span>
                                                <span class="c1">; base address and line routs.</span>
<span class="nl">.waitVbl:</span>
        <span class="k">tst</span><span class="nd">.b </span>  <span class="nv">vblSyncFlag</span>
        <span class="k">beq</span><span class="nd">.s </span>  <span class="p">.</span><span class="nv">waitVbl</span>

        <span class="k">clr</span><span class="nd">.b </span>  <span class="nv">vblSyncFlag</span>                     <span class="c1">; Clear the VBL flag for the next vsync call.</span>

        <span class="k">rts</span>
</code></pre></div></div>

<p>Next, there’s the VBL handler.</p>

<div class="language-m68k highlighter-rouge"><div class="highlight"><pre class="highlight"><code><span class="c1">;----------------------------------------------------------------------------------------------</span>
<span class="c1">; VBL interrupt handler.</span>
<span class="c1">;----------------------------------------------------------------------------------------------</span>
<span class="nl">vbl:</span>    <span class="k">move</span><span class="nd">.l </span> <span class="nb">a0</span><span class="p">,</span><span class="o">-</span><span class="p">(</span><span class="nv">sp</span><span class="p">)</span>                        <span class="c1">; Save register.</span>

        <span class="k">clr</span><span class="nd">.b </span>  <span class="nv">lineRoutsFinished</span>

        <span class="c1">; Set up timer A for sync-scroll.</span>

        <span class="k">clr</span><span class="nd">.b </span>  <span class="mh">$fffffa19</span><span class="nd">.w </span>                    <span class="c1">; Stop Timer A.</span>
        <span class="k">move</span><span class="nd">.l </span> <span class="nd">#</span><span class="nv">syncScroll_timerA</span><span class="p">,</span><span class="mh">$134</span><span class="nd">.w </span>      <span class="c1">; Set Timer A handler.</span>

        <span class="k">move</span><span class="nd">.b </span> <span class="nd">#</span><span class="mi">57</span><span class="p">,</span><span class="mh">$fffffa1f</span><span class="nd">.w </span>                <span class="c1">; Set Timer A counter. This value may need</span>
                                                <span class="c1">; adjustment for optimal timing.</span>
        <span class="k">move</span><span class="nd">.b </span> <span class="nd">#</span><span class="mi">6</span><span class="p">,</span><span class="mh">$fffffa19</span><span class="nd">.w </span>                 <span class="c1">; Start Timer A with chosen prescaler.</span>

        <span class="c1">; Clear the palette to hide the distortion that will be caused by the line routs.</span>

        <span class="k">lea</span><span class="nd">.l </span>  <span class="mh">$ffff8240</span><span class="p">.</span><span class="nv">w</span><span class="p">,</span><span class="nb">a0</span>

        <span class="p">.</span><span class="kr">rept</span> <span class="mi">16</span><span class="o">/</span><span class="mi">2</span>
        <span class="k">clr</span><span class="nd">.l </span>  <span class="p">(</span><span class="nb">a0</span><span class="p">)</span><span class="o">+</span>
        <span class="p">.</span><span class="kr">endr</span>

        <span class="k">move</span><span class="nd">.b </span>  <span class="nd">#</span><span class="mi">1</span><span class="p">,</span><span class="nv">vblSyncFlag</span>

        <span class="k">move</span><span class="nd">.l </span>  <span class="p">(</span><span class="nv">sp</span><span class="p">)</span><span class="o">+</span><span class="p">,</span><span class="nb">a0</span>                       <span class="c1">; Restore register.</span>

        <span class="nv">rte</span>
</code></pre></div></div>

<p>And then the Timer A handler.</p>

<div class="language-m68k highlighter-rouge"><div class="highlight"><pre class="highlight"><code><span class="c1">;----------------------------------------------------------------------------------------------</span>
<span class="c1">; Timer A interrupt handler for sync-scroll.</span>
<span class="c1">;----------------------------------------------------------------------------------------------</span>
<span class="c1">; This handler should fire right before the scanline where the shifter starts reading graphics.</span>
<span class="c1">; - Sync-locks to the first graphics scanline and calls sync-scroll line routs at the right</span>
<span class="c1">;    cycle to apply the offset that was configured using _hscrloff and the _setscr call.</span>
<span class="c1">; - Waits for the end of the graphics on the current line.</span>
<span class="c1">; - Restores the palette.</span>
<span class="c1">;----------------------------------------------------------------------------------------------</span>
<span class="nl">timerA:</span> <span class="k">move</span><span class="nd">.w </span> <span class="nd">#</span><span class="mh">$2700</span><span class="p">,</span><span class="nv">sr</span>                       <span class="c1">; Prevent interrupts.</span>
        <span class="k">clr</span><span class="nd">.b </span>  <span class="mh">$fffffa19</span><span class="nd">.w </span>                    <span class="c1">; Stop Timer A.</span>

        <span class="k">movem</span><span class="nd">.l </span><span class="nb">d0</span><span class="o">/</span><span class="nb">a0</span><span class="o">-</span><span class="nb">a1</span><span class="p">,</span><span class="o">-</span><span class="p">(</span><span class="nv">sp</span><span class="p">)</span>                  <span class="c1">; Save registers.</span>

        <span class="c1">; Prepare registers for line rout calls.</span>

        <span class="k">lea</span><span class="nd">.l </span>  <span class="mh">$ffff820a</span><span class="p">.</span><span class="nv">w</span><span class="p">,</span><span class="nb">a0</span>
        <span class="k">lea</span><span class="nd">.l </span>  <span class="mh">$ffff8260</span><span class="p">.</span><span class="nv">w</span><span class="p">,</span><span class="nb">a1</span>
        <span class="k">moveq</span><span class="nd">.l #</span><span class="mi">0</span><span class="p">,</span><span class="nb">d0</span>

<span class="nl">.syncLock:</span>
        <span class="k">move</span><span class="nd">.b </span> <span class="mh">$ffff8209</span><span class="p">.</span><span class="nv">w</span><span class="p">,</span><span class="nb">d0</span>                  <span class="c1">; Wait for video address to start changing.</span>
        <span class="k">cmp</span><span class="nd">.b </span>  <span class="mh">$ffff8209</span><span class="p">.</span><span class="nv">w</span><span class="p">,</span><span class="nb">d0</span>
        <span class="k">beq</span><span class="nd">.s </span>  <span class="p">.</span><span class="nv">syncLock</span>

        <span class="c1">; The MMU has started reading graphics at this point. The number of already processed</span>
        <span class="c1">; bytes varies slightly.</span>
        <span class="c1">; D0 contains the number of processed graphics bytes. We can use the following trick</span>
        <span class="c1">; to wait for the inverse amount of cycles to compensate for this variation.</span>

        <span class="k">move</span><span class="nd">.b </span> <span class="mh">$ffff8209</span><span class="p">.</span><span class="nv">w</span><span class="p">,</span><span class="nb">d0</span>                  <span class="c1">; Read the number of processed bytes.</span>
        <span class="k">not</span><span class="nd">.b </span>  <span class="nb">d0</span>
        <span class="k">lsr</span><span class="nd">.w </span>  <span class="nb">d0</span><span class="p">,</span><span class="nb">d0</span>                           <span class="c1">; This instruction takes more cycles the larger</span>
                                                <span class="c1">; the value is.</span>

        <span class="c1">; We're sync-locked right now, which means that the number of cycles passed since the</span>
        <span class="c1">; beginning of the scanline is stable. The cycle count on the scanline should be exactly</span>
        <span class="c1">; 200 at this point.</span>

        <span class="c1">; Delay for 276 cycles.</span>
        <span class="p">.</span><span class="kr">rept</span> <span class="mi">276</span><span class="o">/</span><span class="mi">4</span>
        <span class="k">nop</span>
        <span class="p">.</span><span class="kr">endr</span>

        <span class="c1">; The jumps below are calls to sync lines 1-3. The addresses will be overwritten</span>
        <span class="c1">; dynamically by _setscr. The first line rout should start at cycle 504 on the scanline</span>
        <span class="c1">; but since the jsr takes 20 cycles by itself, we should be exactly at cycle 484 right</span>
        <span class="c1">; now.</span>

        <span class="c1">; Calls to the sync line routs. They expect #$ffff820a in a0, #$ffff8260 in a1 and #0 in</span>
        <span class="c1">; d0. Each jsr takes 20 cycles by itself.</span>

<span class="nl">_jvar0:</span> <span class="k">jsr</span>     <span class="nv">_s230</span>
<span class="nl">_jvar1:</span> <span class="k">jsr</span>     <span class="nv">_s230</span>
<span class="nl">_jvar2:</span> <span class="k">jsr</span>     <span class="nv">_s230</span>
        <span class="k">jsr</span>     <span class="nv">_s204</span>                          <span class="c1">; Finish with an extra stabilizer.</span>

        <span class="c1">; The screen should now be offset according to _hscrloff.</span>

        <span class="k">move</span><span class="nd">.b </span> <span class="nd">#</span><span class="mi">1</span><span class="p">,</span><span class="nv">lineRoutsFinished</span>

        <span class="c1">; Delay a bit so that the palette will be restored right after the point where the</span>
        <span class="c1">; graphics end on the current line. The exact number of cycles may need adjustment for</span>
        <span class="c1">; optimal timing.</span>
        <span class="p">.</span><span class="kr">rept</span> <span class="mi">52</span><span class="o">/</span><span class="mi">4</span>
        <span class="k">nop</span>
        <span class="p">.</span><span class="kr">endr</span>

        <span class="c1">; Restore the palette now that we're past the line rout distortion.</span>

        <span class="k">lea</span><span class="nd">.l </span>  <span class="nv">palette</span><span class="p">,</span><span class="nb">a0</span>
        <span class="k">lea</span><span class="nd">.l </span>  <span class="mh">$ffff8240</span><span class="p">.</span><span class="nv">w</span><span class="p">,</span><span class="nb">a1</span>

        <span class="p">.</span><span class="kr">rept</span> <span class="mi">8</span>
        <span class="k">move</span><span class="nd">.l </span> <span class="p">(</span><span class="nb">a0</span><span class="p">)</span><span class="o">+</span><span class="p">,(</span><span class="nb">a1</span><span class="p">)</span><span class="o">+</span>
        <span class="p">.</span><span class="kr">endr</span>

        <span class="c1">; Finish up.</span>

        <span class="k">movem</span><span class="nd">.l </span><span class="p">(</span><span class="nv">sp</span><span class="p">)</span><span class="o">+</span><span class="p">,</span><span class="nb">d0</span><span class="o">/</span><span class="nb">a0</span><span class="o">-</span><span class="nb">a1</span>                  <span class="c1">; Restore registers.</span>
        <span class="k">move</span><span class="nd">.w </span> <span class="nd">#</span><span class="mh">$2300</span><span class="p">,</span><span class="nv">sr</span>                       <span class="c1">; Allow interrupts.</span>
        <span class="k">bclr</span><span class="nd">.b </span> <span class="nd">#</span><span class="mi">5</span><span class="p">,</span><span class="mh">$fffffa0f</span><span class="nd">.w </span>                 <span class="c1">; Signal end of interrupt for timer A.</span>

        <span class="nv">rte</span>
</code></pre></div></div>

<p>As you may have noticed, the code above also includes a call to <code class="language-plaintext highlighter-rouge">_s204</code>, which serves as an extra stabilizer in this case. It can be omitted, but chances are that the sync scroll will be less stable without it. A downside of this approach is that an extra scanline is unavailable for graphics.</p>

<p>And finally, a few variables that are used by the code above.</p>

<div class="language-m68k highlighter-rouge"><div class="highlight"><pre class="highlight"><code>        <span class="p">.</span><span class="nv">bss</span>

<span class="nl">vblSyncFlag:</span>        <span class="p">.</span><span class="kt">ds</span><span class="nd">.b </span><span class="mi">1</span>
<span class="nl">lineRoutsFinished:</span>  <span class="p">.</span><span class="kt">ds</span><span class="nd">.b </span><span class="mi">1</span>

<span class="c1">; Make sure to set the following variables in your code and keep them up to date where needed.</span>

<span class="nl">videoBase:</span>          <span class="p">.</span><span class="kt">ds</span><span class="nd">.l </span><span class="mi">1</span>
<span class="nl">scrollOffset:</span>       <span class="p">.</span><span class="kt">ds</span><span class="nd">.l </span><span class="mi">1</span>
<span class="nl">palette:</span>            <span class="p">.</span><span class="kt">ds</span><span class="nd">.w </span><span class="mi">16</span>                    
</code></pre></div></div>

<h2 id="virtual-scrolling">Virtual scrolling</h2>

<p>Now that I could leverage sync scrolling and no longer needed to redraw the entire screen each frame, I only had to draw the parts that come into view at each scrolling step. This would save a large amount of CPU cycles, which then could be spent on other things, like drawing more sprites or achieving a higher frame rate. This can be achieved by using a technique called <em>virtual scrolling</em>, where a <em>virtual screen</em> is used that is larger than the actual screen.</p>

<p>As explained in the <a href="/2026/03/02/display-layout.html">Display layout</a> post, I’m calling the visible screen the <em>viewport</em>, and with virtual scrolling it shows a portion of the virtual screen. The viewport can be panned to display any portion of the virtual screen, as long as the viewport fits in the virtual screen entirely. By panning the viewport, we can achieve the illusion of scrolling. In our case, a vertically scrolling game, we need vertical panning only, so the virtual screen should be the same width as the viewport. The height of the virtual screen, however, should be exactly two screens high.</p>

<p>To achieve infinite scrolling, however, we’d need an infinitely large virtual screen, which of course is not possible. By cleverly painting graphics into the virtual screen each time the screen scrolls, we can keep the virtual screen filled in such a way that when the viewport reaches the end of the virtual screen, it can be rotated all the way back to the other end, and the graphics that are already painted there seamlessly match the graphics at the previous position.</p>

<blockquote>
  <p>There’s a lot more to be said about virtual scrolling and I’ll elaborate more on it in a future post.</p>
</blockquote>

<h2 id="up-next">Up next</h2>

<p>Continue reading with the next post: <a href="/2026/03/26/mshort.html">Switching to -mshort</a></p>

<h2 id="acknowledgements">Acknowledgements</h2>

<p>I want to thank <a href="https://demozoo.org/sceners/2443">Troed</a> and <a href="https://demozoo.org/sceners/31979">Rapido</a> for their feedback on this post during its writing. They pointed out some issues and provided valuable suggestions.</p>

<h4 id="footnotes">Footnotes</h4>

<div class="footnotes" role="doc-endnotes">
  <ol>
    <li id="fn:1" role="doc-endnote">
      <p>VBL stands for Vertical Blank, which is the period of time when the electron beam in a CRT display is moving from the bottom of the screen back to the top. During this time, the screen is not being drawn. <a href="#fnref:1" class="reversefootnote" role="doc-backlink">&#8617;</a></p>
    </li>
  </ol>
</div>]]></content><author><name>Sandor Drieënhuizen aka Zeme/Dawn</name></author><summary type="html"><![CDATA[As you may know, the Atari ST (unlike the STE) officially doesn’t support hardware scrolling. In this post, I’m going to talk about a demoscene technique that allows an ST to achieve basic hardware scrolling regardless of that restriction. This technique is called sync scrolling.]]></summary></entry><entry><title type="html">The screen buffer</title><link href="http://blog.subspace.nl/2026/03/03/the-screen-buffer.html" rel="alternate" type="text/html" title="The screen buffer" /><published>2026-03-03T00:00:00+00:00</published><updated>2026-03-03T00:00:00+00:00</updated><id>http://blog.subspace.nl/2026/03/03/the-screen-buffer</id><content type="html" xml:base="http://blog.subspace.nl/2026/03/03/the-screen-buffer.html"><![CDATA[<p>In the last post, we explored the display layout. This time, we’ll look at the screen buffer and how graphics are stored in it.</p>

<blockquote>
  <p>Today’s post isn’t about the game itself, but I felt that it was important to cover some of the technical details of how the Atari ST’s screen buffer works for those who don’t have prior knowledge.</p>

  <p>I’m assuming you already have a basic understanding of binary arithmetic. Otherwise, this post might be a bit hard to follow. The obligatory <a href="https://en.wikipedia.org/wiki/Binary_number#Counting_in_binary">Wikipedia link</a> may be of help here.</p>
</blockquote>

<h2 id="display-modes">Display modes</h2>

<p>The Atari ST has a few different display modes, but the one used for this game (like most games on the ST) is called <em>low-res</em> mode, with a resolution of 320x200 pixels and 16 simultaneous colors from a palette of 512 possible colors.</p>

<h2 id="palette">Palette</h2>

<p>The palette is a set of colors that can be used in the display. Each color in the palette is defined by a combination of red, green, and blue (RGB) values.</p>

<p>Because the Atari ST’s palette allows for 512 different colors, a color consists of 3 bits for each primary color (R, G and B), with a total of 9 bits (2^9 = 512).</p>

<p>Each palette entry is stored as a 16-bit word in memory. The bits for each color are arranged as follows:</p>

<div class="language-plaintext highlighter-rouge"><div class="highlight"><pre class="highlight"><code>Bit 15 14 13 12 11 10 09 08 07 06 05 04 03 02 01 00
     -  -  -  -  -  r  r  r  -  g  g  g  -  b  b  b
</code></pre></div></div>

<blockquote>
  <p>On the Atari STE, there’s an extra bit per primary color, which allows for 4096 colors, but this game targets the Atari ST, so we won’t go into that here.</p>
</blockquote>

<p>For example, a palette could look like this:</p>

<p><img src="../../../assets/img/posts/2026-03-03-the-screen-buffer/Palette.png" alt="Diagram" /></p>

<p>This results in the following hexadecimal values for the palette entries:</p>

<div class="language-plaintext highlighter-rouge"><div class="highlight"><pre class="highlight"><code>     0    1    2    3    4    5    6    7    8    9   10   11   12   13   14   15
$ 0000 0211 0631 0771 0472 0143 0224 0347 0267 0134 0333 0324 0635 0442 0667 0777
</code></pre></div></div>

<h2 id="memory-layout">Memory layout</h2>

<p>Because low-res supports 16 colors, each pixel is represented by 4 bits (since 2^4 = 16).</p>

<p>Each bit of a pixel color is stored separately in a <em>bitplane</em>. Because there are 4 bits per pixel, there are 4 bitplanes. Conceptually, you can think of the bitplanes as layers that together form the final image. Each bitplane contributes one bit to the color of each pixel, and the combination of these bits determines the final color displayed on the screen.</p>

<p><img src="../../../assets/img/posts/2026-03-03-the-screen-buffer/Bitplanes1.png" alt="Diagram" /></p>

<p>However, the bitplanes are stored in the display buffer in an interleaved manner, divided into 16-bit words. After the first 16-bit word of bitplane 0, the first 16-bit word of bitplane 1 follows, then bitplane 2, and finally bitplane 3. After that, the second 16-bit word of bitplane 0 follows, and so on.</p>

<p><img src="../../../assets/img/posts/2026-03-03-the-screen-buffer/ScreenBuffer.png" alt="Diagram" /></p>

<p>This means that the memory layout can be represented like below, where the first pixel on the display (at coordinates X=0, Y=0) is represented by the first 4 bits of the first 16-bit word in each bitplane, and so on for the rest of the pixels.</p>

<p><img src="../../../assets/img/posts/2026-03-03-the-screen-buffer/Bitplanes2.png" alt="Diagram" /></p>

<p>In the diagram above, you can see where the bits of the first pixel (located at x=0, y=0, which is the top-left of the screen) are located in the bitplanes.</p>

<p>To further illustrate this, let’s look at the second pixel (located at x=1, y=0):</p>

<p><img src="../../../assets/img/posts/2026-03-03-the-screen-buffer/Bitplanes3.png" alt="Diagram" /></p>

<h2 id="example">Example</h2>

<p>A fragment of a screen buffer with some example pixels drawn on it could look like this:</p>

<div class="language-plaintext highlighter-rouge"><div class="highlight"><pre class="highlight"><code>          Bitplane 0       Bitplane 1       Bitplane 2       Bitplane 3      
y=0 ---------------- ---------------- ---------------- ----------------
y=1 --111----------- ---------------- --111----------- --111-----------
y=2 -1---1---------- -1---1---------- ---------------- ----------------
y=3 -11111---------- -1---1---------- -11111---------- ----------------
y=4 -1---1---------- -1---1---------- ---------------- ----------------
y=5 -1---1---------- -1---1---------- ---------------- ----------------
y=6 ---------------- ---------------- ---------------- ----------------
</code></pre></div></div>
<blockquote>
  <p>Note that I’ve replaced the 0s with dashes for better readability</p>
</blockquote>

<p>To find the color of a pixel, you would take the corresponding bits from each bitplane and combine them. For example, for the pixel at the exact center of the <code class="language-plaintext highlighter-rouge">A</code> shape (<code class="language-plaintext highlighter-rouge">x=3, y=3</code>), you’d take:</p>
<ul>
  <li>Bit <code class="language-plaintext highlighter-rouge">4</code> from bitplane <code class="language-plaintext highlighter-rouge">0</code> on row <code class="language-plaintext highlighter-rouge">y=3</code> (which is <code class="language-plaintext highlighter-rouge">1</code>)</li>
  <li>Bit <code class="language-plaintext highlighter-rouge">4</code> from bitplane <code class="language-plaintext highlighter-rouge">1</code> on row <code class="language-plaintext highlighter-rouge">y=3</code> (which is <code class="language-plaintext highlighter-rouge">0</code>)</li>
  <li>Bit <code class="language-plaintext highlighter-rouge">4</code> from bitplane <code class="language-plaintext highlighter-rouge">2</code> on row <code class="language-plaintext highlighter-rouge">y=3</code> (which is <code class="language-plaintext highlighter-rouge">1</code>)</li>
  <li>Bit <code class="language-plaintext highlighter-rouge">4</code> from bitplane <code class="language-plaintext highlighter-rouge">3</code> on row <code class="language-plaintext highlighter-rouge">y=3</code> (which is <code class="language-plaintext highlighter-rouge">0</code>)</li>
</ul>

<p>This gives you a binary value of <code class="language-plaintext highlighter-rouge">1010</code>, which translates to 10 in decimal, meaning that the pixel gets the color at index 10 of the palette.</p>

<p>Finally, to get a sense of how this is stored in memory, the example bitmap expressed in hexadecimal values looks like this:</p>

<div class="language-plaintext highlighter-rouge"><div class="highlight"><pre class="highlight"><code>$ 0000 0000 0000 0000
$ 3800 0000 3800 3800
$ 4400 4400 0000 0000
$ 7c00 4400 7c00 0000
$ 4400 4400 0000 0000
$ 4400 4400 0000 0000
$ 0000 0000 0000 0000
</code></pre></div></div>

<h2 id="consequences">Consequences</h2>

<p>The bitplane layout makes graphics programming a bit more complex, but it also allows for some interesting techniques, such as using the bitplanes to create special effects by manipulating them separately. For instance, you can draw graphics to only a few of the bitplanes instead of all four, to save CPU time, at the cost of having a limited number of colors for those graphics.</p>

<h2 id="up-next">Up next</h2>

<p>Continue reading with the next post: <a href="/2026/03/18/sync-scrolling.html">Sync scrolling</a></p>]]></content><author><name>Sandor Drieënhuizen aka Zeme/Dawn</name></author><summary type="html"><![CDATA[In the last post, we explored the display layout. This time, we’ll look at the screen buffer and how graphics are stored in it.]]></summary></entry><entry><title type="html">Display layout</title><link href="http://blog.subspace.nl/2026/03/02/display-layout.html" rel="alternate" type="text/html" title="Display layout" /><published>2026-03-02T00:00:00+00:00</published><updated>2026-03-02T00:00:00+00:00</updated><id>http://blog.subspace.nl/2026/03/02/display-layout</id><content type="html" xml:base="http://blog.subspace.nl/2026/03/02/display-layout.html"><![CDATA[<p>Now that we’ve glanced over the technical design of the game in the previous post, let’s take a look at the most prominent aspect of the game: the display and how it’s laid out.</p>

<p>I thought it best to address this topic early because I’ll use display-related terms a lot, and they can be confusing if not clearly defined.</p>

<blockquote>
  <p>Over the years as a software developer, I’ve learned that it’s very important to have clear definitions of the concepts and parts that are at play in a system. It’s easy to get lost in the details and lose sight of the big picture, especially when you are using synonyms for the same concept, or worse, when you are using the same word to refer to different concepts.</p>
</blockquote>

<h2 id="definitions">Definitions</h2>

<p>Let’s define some basic aspects of the display.</p>

<p>The <em>screen</em> comprises the entire visible display area. The diagram below shows the <em>addressable screen</em> — the portion of the display that the hardware designates for drawing graphics. I use the term <em>addressable</em> to indicate that this area is the only one where the program can write graphics. The remaining area, the <em>border area</em>, is not intended to be accessible to the program.</p>

<blockquote>
  <p>Actually, the border area can be made addressable using a demoscene technique that I’ll explain in a later post.</p>
</blockquote>

<p><img src="../../../assets/img/posts/2026-03-02-display-layout/Screen0.png" alt="Diagram" /></p>

<blockquote>
  <p>Borders around the screen are a common feature of retro computer systems. They were originally intended as a buffer for the display hardware because picture adjustments varied widely between different monitors and TVs (which were almost always CRTs). Modern displays use panels with fixed pixel dimensions however, so these borders are no longer necessary.</p>
</blockquote>

<p>The game’s primary orientation is vertical; most aspects discussed here don’t depend on horizontal dimensions. For brevity, I’m omitting the horizontal borders and dimensions from the diagrams from now on.</p>

<p><img src="../../../assets/img/posts/2026-03-02-display-layout/Screen1.png" alt="Diagram" /></p>

<p>The border area is now divided into two different areas: the <em>top border</em> and the <em>bottom border</em>.</p>

<p><img src="../../../assets/img/posts/2026-03-02-display-layout/Screen2.png" alt="Diagram" /></p>

<p>Using the demoscene technique I referred to earlier, the game extends the addressable screen to include portions of the top and bottom border areas. Not all of the border areas are reclaimed, however. I decided to keep the reclaimed area limited because players who still use a classic CRT monitor may not see the entire screen as graphics can disappear behind the edges of the display.</p>

<blockquote>
  <p>While it’s technically possible to extend the addressable screen to include the left and right borders as well, it’s virtually impossible in a game because doing so would introduce timing requirements that are too constraining for a dynamic environment.</p>
</blockquote>

<p><img src="../../../assets/img/posts/2026-03-02-display-layout/Screen3.png" alt="Diagram" /></p>

<p>Now that we’ve defined the extended addressable screen, we’ll call it the <em>viewport</em> from now on. This makes reasoning about the display layout easier while the previous term remains useful in a more technical context.</p>

<blockquote>
  <p>To conclude with a final definition for <strong><em>viewport</em></strong>: it’s the area of the screen that is used for drawing the game graphics.</p>
</blockquote>

<p><img src="../../../assets/img/posts/2026-03-02-display-layout/Screen4.png" alt="Diagram" /></p>

<p>Next are the <em>playfield</em> and the <em>status panel</em>, both contained within the viewport. The <em>playfield</em> holds the level graphics; the <em>status panel</em> shows game information such as the number of lives and the amount of health the player has.</p>

<p><img src="../../../assets/img/posts/2026-03-02-display-layout/Screen5.png" alt="Diagram" /></p>

<p>The game uses the <em>sync scrolling</em> demoscene technique (which I’ll cover in a future post as well), and it affects the screen layout. As a result, several <a href="https://en.wikipedia.org/wiki/Scanline">scanlines</a> — called <em>sync lines</em> — are not available for drawing and must be blanked out to avoid graphical glitches.</p>

<blockquote>
  <p>Blanking out graphics means the game uses a completely black palette during rendering of the area to hide any graphical content or background color.</p>
</blockquote>

<p>Also, to adjust the vertical position of the viewport, another area at the top is blanked out, as indicated by <code class="language-plaintext highlighter-rouge">viewport y-offset</code> in the diagram below.</p>

<p><img src="../../../assets/img/posts/2026-03-02-display-layout/Screen6.png" alt="Diagram" /></p>

<h2 id="combining-the-aspects">Combining the aspects</h2>

<p>In the diagram below, you can find a combined overview of the aspects explained above. I often use this diagram myself as a reference when I write display-related code for the game.</p>

<p><img src="../../../assets/img/posts/2026-03-02-display-layout/Screen7.png" alt="Diagram" /></p>

<h2 id="summary">Summary</h2>

<p>Now that we’ve defined the display’s components, we can use this knowledge to understand concepts in future posts. Stay tuned!</p>

<blockquote>
  <p>Oh, and one more thing… I wanted to share a small teaser of the game, so I here’s a cut-out of a screenshot I took. It’s from an early version; the graphics may change considerably over time. <img src="../../../assets/img/posts/2026-03-02-display-layout/Teaser1.png" alt="Teaser" /></p>
</blockquote>

<h2 id="up-next">Up next</h2>

<p>Continue reading with the next post: <a href="/2026/03/03/the-screen-buffer.html">The screen buffer</a></p>]]></content><author><name>Sandor Drieënhuizen aka Zeme/Dawn</name></author><summary type="html"><![CDATA[Now that we’ve glanced over the technical design of the game in the previous post, let’s take a look at the most prominent aspect of the game: the display and how it’s laid out.]]></summary></entry><entry><title type="html">Technical design</title><link href="http://blog.subspace.nl/2026/02/27/technical-design.html" rel="alternate" type="text/html" title="Technical design" /><published>2026-02-27T00:00:00+00:00</published><updated>2026-02-27T00:00:00+00:00</updated><id>http://blog.subspace.nl/2026/02/27/technical-design</id><content type="html" xml:base="http://blog.subspace.nl/2026/02/27/technical-design.html"><![CDATA[<p>Before I dive into all of the technical details, I thought it would be a good idea to give you an overview of the technical design of the game.</p>

<h2 id="background">Background</h2>

<p>But first, let me briefly address the experience I gained in my career as a software developer. I won’t turn this into a resume, but I think it’s worth mentioning that I have been working as a software developer for over 25 years now and that I’ve learned a lot about software design and development. I’ve been working on .NET-based B2B solutions mostly but there’s so much that I have learned that is applicable to game development as well.</p>

<h2 id="development-environment">Development environment</h2>

<p>As I mentioned in the <a href="/2026/02/20/introduction.html">Introduction</a> post, I managed to set up a C-based cross-compilation development environment for the Atari ST, based on <a href="https://tho-otto.de/crossmint.php">Thorsten Otto’s m68k-atari-mint cross-tools</a>. Combined with the equally great <a href="https://rmac.is-slick.com">RMAC assembler</a>, this allows me to write the game in C and assembly.</p>

<p>This means that I can write code on my PC and then build the game and test it in an emulator, which is a much more comfortable development environment than working on the ST itself. It also allows for a much faster development cycle since I don’t have to transfer the build files to the ST every time I want to test something.</p>

<p>I’m using version <code class="language-plaintext highlighter-rouge">15.2.0</code> of GCC (the C compiler) which allows me to use relatively modern C features.</p>

<blockquote>
  <p>I must admit that I’m not aware of all of those newer features, partly because I hadn’t been programming in C for many years, so I probably take most of them for granted. But I do know that compared to the older C/C89/C90 standards (as was common on the ST), I can use things like single-line comments and freely placeable variable declarations, which is really convenient.</p>
</blockquote>

<h2 id="dependencies-and-tools">Dependencies and tools</h2>

<p>Let’s start with a list of tools:</p>

<ul>
  <li><a href="https://www.aseprite.org">Aseprite</a>
    <ul>
      <li>This is the tool used to create most of the game’s graphics, such as sprites and tiles.</li>
    </ul>
  </li>
  <li><a href="https://www.julien-nevo.com/arkostracker">Arkos Tracker 3</a>
    <ul>
      <li>This is the tool used to create the game’s music and SFX.</li>
    </ul>
  </li>
  <li><a href="https://godotengine.org">Godot Engine</a>
    <ul>
      <li>While this is a complete game engine for modern computers, Godot is only used as an editor for the game’s levels. Using a custom script, level data is exported in a format that can be used by the game.</li>
    </ul>
  </li>
  <li><a href="https://github.com/upx/upx">UPX</a>
    <ul>
      <li>This is a general-purpose executable packer that I use to compress the executable game binary.</li>
    </ul>
  </li>
</ul>

<p>I decided to use as few libraries as possible to keep the game small and retain full control over the code. This means that I have written my own code for things like sprite drawing, tile drawing, input handling, etc.</p>

<blockquote>
  <p>I’m not under the illusion that my code is better than some of the available libraries I could have used but I wanted to take the challenge of writing as much as possible myself, to maximize my understanding of the matter.</p>
</blockquote>

<p>There are some libraries that I do use, however, mainly because I could not reasonably write them, or it didn’t make sense to do so:</p>

<ul>
  <li><a href="https://github.com/freemint/libcmini">Libcmini</a>
    <ul>
      <li>To get some basic C library functions, such as string handling and file I/O.</li>
    </ul>
  </li>
  <li><a href="https://codeberg.org/troed/SYNC-scroll">Sync scrolling library</a>
    <ul>
      <li>This library by <a href="https://demozoo.org/sceners/2443">Troed</a> allows the display address to be positioned with 2-byte granularity.</li>
    </ul>
  </li>
  <li><a href="https://codeberg.org/troed/WSDETECT">Wakestate detector</a>
    <ul>
      <li>Also by <a href="https://demozoo.org/sceners/2443">Troed</a>; it is used to properly initialize the sync scroller for the hardware.</li>
    </ul>
  </li>
  <li><a href="https://github.com/arnaud-carre/lz4-68k">LZ4 depacker</a>
    <ul>
      <li>This library by <a href="https://demozoo.org/sceners/2527">Leonard</a> is used to decompress the game’s assets, such as graphics and level data.</li>
    </ul>
  </li>
  <li><a href="https://github.com/ggnkua/Arkos-Tracker-2-ST">Arkos Music player</a>
    <ul>
      <li>This is the 68000 port of the official player by <a href="https://demozoo.org/sceners/10489">GGN</a>.</li>
    </ul>
  </li>
</ul>

<blockquote>
  <p>Note that the list of dependencies and tools is neither complete nor final. More dependencies may be added in the future, or removed if a better solution is found.</p>
</blockquote>

<h2 id="build-chain">Build chain</h2>

<p>The build chain is pretty straightforward. I have a <a href="https://www.gnu.org/software/make/manual/make.html#Introduction">Makefile</a> that defines the build process, which includes:</p>

<ul>
  <li>Running the asset pipeline to process the game’s assets (see below)</li>
  <li>Compiling the C code</li>
  <li>Assembling the assembly code</li>
  <li>Linking the C and assembly build outputs together</li>
  <li>Compressing the linked binary</li>
  <li>Creating a disk image that can be run in an emulator</li>
</ul>

<p>I’ll elaborate on the build chain in a future post.</p>

<h2 id="asset-pipeline">Asset pipeline</h2>

<p>The asset pipeline is a custom tool that I wrote to process the game’s assets, such as graphics and music. Some of the things that the asset pipeline does include:</p>

<ul>
  <li>Converting assets into the appropriate format, e.g.,
    <ul>
      <li>Convert <code class="language-plaintext highlighter-rouge">.PNG</code> files to 4-bitplane graphics data (optionally masked).</li>
      <li>Convert level data into a format that is optimized for use in the game.</li>
    </ul>
  </li>
  <li>Compress and combine all asset files into a single file.
    <ul>
      <li>Files are placed in a specific order to minimize the drive head seek times when loading.</li>
    </ul>
  </li>
  <li>Generate C header files that help address the assets from the game code.</li>
</ul>

<blockquote>
  <p>I can sum up many reasons for combining the asset files into a single file, but honestly, I just did it because I thought it was cool.</p>
</blockquote>

<p>I’ll elaborate on the asset pipeline in a future post.</p>

<h2 id="codebase">Codebase</h2>

<h3 id="design-principles">Design principles</h3>

<p>I tried using a modular design for the codebase, with separate modules for things like graphics, input, audio, etc. in an attempt to keep the code organized and maintainable.</p>

<p>But even more importantly, I take great care to <a href="https://www.namingthings.co">use proper names</a> for concepts, functions, variables, etc. I think that this is one of the most important things to do when writing code, as it makes it much easier to understand and maintain the code in the long run.</p>

<p>I’m also trying to stay consistent with coding style and <a href="https://en.wikipedia.org/wiki/Naming_convention_(programming)">naming conventions</a>, to make the code more readable and easier to navigate.</p>

<h3 id="object-oriented-programming">Object Oriented Programming</h3>

<p>Since I’m using C and not C++, there is no built-in support for classes or polymorphism. But for some parts of the code, I wanted some features of <a href="https://en.wikipedia.org/wiki/Object-oriented_programming">Object-Oriented Programming</a>, such as encapsulation and polymorphism. To achieve this, I implemented a simple component system, similar to the one presented in articles like <a href="https://www.codementor.io/@michaelsafyan/object-oriented-programming-in-c-du1081gw2">Object-Oriented Programming (OOP) in C</a>. I’ll write more about this in a future post.</p>

<h3 id="c-calling-convention">C calling convention</h3>

<p>One particular convention I’m paying attention to is the so-called <em>calling convention</em>, which defines how functions receive parameters and return values. I’m using the <code class="language-plaintext highlighter-rouge">fastcall</code> calling convention, which means that the first few arguments are passed in registers, and the rest are passed on the stack. Because the ST has a notoriously slow memory bus, this is a significant performance boost, at least when doing a lot of calls.</p>

<p>The same calling convention also applies to situations where the compiler generates code that calls linked assembly functions, so it’s important to take into account when writing assembly code that is called from C.</p>

<p>Another aspect of the convention is some of the registers are reserved for the caller and some for the callee. This means that both sides have to take care of saving previous register values before using them. A few registers, however, are designated as <em>clobbered</em>, which means that they can be used by both the caller and the callee without saving their previous values.</p>

<blockquote>
  <p>Many times, when ‘strange’ things were happening during code execution, I had to conclude that it was because I forgot to save a register.</p>
</blockquote>

<h3 id="memory-management">Memory management</h3>

<p>At some point during execution, memory needs to be allocated to hold things like sprites, tilemaps, level data, etc. Those allocations need to be freed at some point as well, to avoid running out of memory. Since the <a href="https://en.wikipedia.org/wiki/Atari_TOS">TOS operating system</a> has some <a href="https://freemint.github.io/tos.hyp/en/gemdos_memory.html#Malloc">known problems regarding memory allocations</a>, I decided to play safe and implement a simple, naive memory manager that suits the needs of the game. Basically, I simply allocate all memory at the start of the game with a single <code class="language-plaintext highlighter-rouge">malloc()</code> call, and then manage memory allocations myself.</p>

<h3 id="object-pools">Object pools</h3>

<p>Since performing allocations (and deallocations for that matter) are relatively costly operations, I didn’t want to do them during gameplay. In fact, it is common practice in game development to avoid dynamic memory allocations during gameplay, even in modern games.</p>

<p>This means I had to find a way to pre-allocate memory for all the objects that I need during gameplay. I decided to implement object pools, where arrays of more or less specific types of objects are pre-allocated at the start of the game.</p>

<p>One advantage of this approach is that I can prevent having to search through lists of objects during gameplay, which can be costly. Instead, I can simply make sure there’s an object pool available that is pre-filtered to suit the search criteria. Of course, this means that I have to be careful not to have too many pools because that would become costly as well.</p>

<h3 id="metrics">Metrics</h3>

<p>When optimizing code, it’s important to have metrics to measure the performance of the code and to identify bottlenecks. I have implemented a simple metrics system that records CPU cycles. This is possible because of a recent addition to the <a href="https://www.hatari-emu.org/">Hatari emulator</a>, which allows using <a href="http://clarets.org/steve/projects/20200831_atari_natfeats.html">Natfeats</a> to get the current CPU counter value.</p>

<blockquote>
  <p>Note that this is not possible on a real ST, since there is no CPU counter on the ST.</p>
</blockquote>

<p>The program then writes <a href="https://en.wikipedia.org/wiki/Comma-separated_values">CSV</a> formatted data to the debugger console, which allows me to easily process and analyze the performance of different parts of the game.</p>

<h3 id="optimization">Optimization</h3>

<p>Talking about optimization, this is a really important aspect of designing games, especially for a platform like the Atari ST, which has very limited resources compared to modern computers. It’s a constant balancing act between writing code that is easy to understand and maintain, and writing code that is optimized for performance or memory usage.</p>

<p>Some of the optimization techniques that I use include:</p>

<ul>
  <li>Write performance-critical code in assembly.</li>
  <li>Pre-shift sprites in order to avoid shifting them during gameplay, since shift operations are costly on the 68000.</li>
  <li>Pre-calculate data tables to reduce the need for expensive CPU instructions such as <code class="language-plaintext highlighter-rouge">mulu</code> and <code class="language-plaintext highlighter-rouge">muls</code> for multiplications.</li>
</ul>

<h3 id="debugging">Debugging</h3>

<p>Well, this is an area I know I will have to put more effort into. There are a lot of possibilities for improving my workflow here. One of them is checking out Hildenborg’s excellent work on <a href="https://github.com/hildenborg/m68k-atari-dev/tree/main">debugging support</a> but I haven’t found the time yet to set it up.</p>

<p>For now, I rely on the Hatari emulator’s built-in CLI-based debugger, which is pretty good although the learning curve is relatively steep. I know about the existence of <a href="http://clarets.org/steve/projects/hrdb.html">Hatari Remote Debugger GUI</a>, but I haven’t tried it yet either.</p>

<h2 id="wrapping-up">Wrapping up</h2>

<p>This is just a brief, high-level overview of the technical design of the game. In future posts, I will dive into more details about specific technical aspects of the game, such as how I implemented scrolling, how I draw graphics, etc. Stay tuned!</p>

<h2 id="up-next">Up next</h2>

<p>Continue reading with the next post: <a href="/2026/03/02/display-layout.html">Display layout</a></p>]]></content><author><name>Sandor Drieënhuizen aka Zeme/Dawn</name></author><summary type="html"><![CDATA[Before I dive into all of the technical details, I thought it would be a good idea to give you an overview of the technical design of the game.]]></summary></entry><entry><title type="html">Game concept</title><link href="http://blog.subspace.nl/2026/02/25/game-concept.html" rel="alternate" type="text/html" title="Game concept" /><published>2026-02-25T00:00:00+00:00</published><updated>2026-02-25T00:00:00+00:00</updated><id>http://blog.subspace.nl/2026/02/25/game-concept</id><content type="html" xml:base="http://blog.subspace.nl/2026/02/25/game-concept.html"><![CDATA[<p>Bear with me — this is going to be a relatively long one. Before I get into the details of the Atari ST game I’m developing, I want to give you a good idea of what the game is about, why I’m developing it, and why I’m so excited about it. Some history needs to be told first.</p>

<h2 id="some-more-history">Some more history</h2>

<p>I didn’t even mention this in the <a href="/2026/02/20/introduction.html">Introduction</a>, but I was 9 years old when my dad bought his second computer. It was a <a href="https://sharpmz.zdechov.net/?wiki/mz-800">Sharp MZ-800</a>, the successor of the <a href="https://sharpmz.zdechov.net/?wiki/mz-700">Sharp MZ-700</a> which he had sold. We drove to a larger nearby city to buy it at a store called “Kwantum Hallen.” He paid around 500 Dutch guilders, which was a decent price.</p>

<blockquote>
  <p>I had handled the MZ-700 a few times before, but it was the MZ-800 that really got me interested.</p>
</blockquote>

<p>The MZ-800 was a very solidly built machine, based on the 8-bit Zilog Z80 CPU, and it had 64 KB of RAM. The architecture was pretty similar to the ZX Spectrum and MSX machines of the time.</p>

<p>Our model had this cool 2.8” Quick Disk drive that could store 64 KB of data on each side (yes, you had to flip the disk to access the other side). The drive had a top-loading mechanism and I still remember the typical sounds it made. One particular aspect of this drive was that data was stored in a spiral pattern, much like the way data is stored on a cassette tape. This meant there were no tracks or sectors on the disk, and when you wanted to delete a file, you had to load the disk’s contents into memory and write it back without the file you wanted to delete.</p>

<p><img src="../../../assets/img/posts/2026-02-25-game-concept/SharpMZ800.jpg" alt="Sharp MZ-800" />
<em>My Sharp MZ-800 with a Quick Disk drive installed</em></p>

<h2 id="games-on-the-mz-800">Games on the MZ-800</h2>

<p>We had only a handful of games for the MZ. A friend of mine who had a C64 had many more, and I was a bit envious. But I liked my games nonetheless.</p>

<p>Some of the games I have fond memories of:</p>

<h3 id="tutanchamun">Tutanchamun</h3>

<p>This is a very tense game where you have to run through a maze, fetch keys while avoiding enemies. Time counts down quickly, so you have to be fast. To survive, you need to collect artifacts that grant extra points, extra lives, and smart bombs. But if you spend too much time collecting artifacts, you’ll run out of time and lose a life anyway.</p>

<p><img src="../../../assets/img/posts/2026-02-25-game-concept/Tutanchamun.png" alt="Tutanchamun" />
<em>Tutanchamun on the Sharp MZ-800</em></p>

<p>Last month, I found out that this game was actually a port (or most likely a clone) of the arcade game <a href="https://www.youtube.com/watch?v=7Z242gkTzmM">Tutankham</a> by Konami (1982). Back then I had no idea, but it didn’t matter because it was exciting to play, although I thought it was very difficult. I played it again recently and still find it pretty hard, although I managed to get much further than when I was a kid.</p>

<h3 id="nakamoto">Nakamoto</h3>

<p>I think this is one of the signature Sharp MZ games, probably of Japanese origin, given its name. It’s a puzzle platformer where you have to collect items and avoid enemies.</p>

<p><img src="../../../assets/img/posts/2026-02-25-game-concept/Nakamoto.png" alt="Nakamoto" />
<em>Nakamoto on the Sharp MZ-800</em></p>

<p>I didn’t realize it at the time, but now that I have looked at it again, it appears to run in character mode. One of the things that gives it away is that when sprites are supposed to overlap, they cancel each other out. This probably means it runs on an MZ-700 as well, as that machine only had 2 KB of VRAM and no graphics capabilities other than custom fonts in character mode.</p>

<h4 id="vram">VRAM</h4>

<p>I soon found out that the MZ needed a VRAM upgrade to be able to play most games. The standard MZ-800 came with 16 KB of VRAM, which was enough for a resolution of 320x200 with 4 colors. But most games required 32 KB of VRAM, which allowed for a resolution of 640x200 with 4 colors or 320x200 with 16 colors (much like the ST but without the extra colors from a palette). The next time my dad took me to a HCC MZ-GG<sup id="fnref:1" role="doc-noteref"><a href="#fn:1" class="footnote" rel="footnote">1</a></sup> meetup, he bought a 16 KB VRAM chip which we then inserted into the VRAM socket on the motherboard of the MZ. I think it cost around 80 Dutch guilders at the time, which was quite a lot of money. But boy, did it open up a whole new world!</p>

<h2 id="basic">Basic</h2>

<p>Not long after, I wrote my first Basic program on the MZ. At that time, I didn’t get much further than drawing a series of growing circles and making the computer play a few simple notes. I don’t remember how I figured out how to even do that. I guess my dad gave me some pointers since he was a bit familiar with programming, but he doesn’t recall that at all. It’s typical for a kid: these kinds of things simply look natural, and you figure them out by playing around.</p>

<p>Talking about circles, it was quite unique for a Basic to be able to draw primitive shapes like circles, lines and rectangles. Most Basics at the time only had a command to plot individual pixels and you’d have to resort to <code class="language-plaintext highlighter-rouge">POKE</code> eventually. My Basic interpreter supported drawing scaled text, which was pretty neat.</p>

<blockquote>
  <p>I remember taking the MZ to my school one day and connecting it to the big TV in the school’s auditorium. During lunch break, under our teacher’s supervision, I showed a few programs to my class; most were puzzled and didn’t really understand what was going on. But I loved showing the MZ — I was so proud of it.</p>
</blockquote>

<p>As my Basic skills improved, I started writing some simple games myself. When I was 12 years old, I finally had a working game that was more than a simple concept. It boasted a maze, a player character and some enemies. I called it “Labyrint”.</p>

<blockquote>
  <p>“Labyrint” is the Dutch spelling of “labyrinth”, so it’s not a typo — though I’m not sure I was aware of that back then.</p>
</blockquote>

<p>And you know what? I still have the source code! Back in the day, in a bright moment, I decided to print it on my dad’s dot-matrix printer (probably also because I liked to print stuff anyway). I still have the printout in a box upstairs. I tried OCR-ing it a few years ago, but the dot-matrix typeface didn’t play nice with the OCR software I had. So I decided to just type it out again. Fortunately, it wasn’t too much code, so I managed to do it in an hour or so. I made a handful of errors, which easily happens because there are a lot of hex codes in the source. But I was able to fix the mistakes by debugging. I added a second error handler that shows the error code and the line number.</p>

<blockquote>
  <p>There are likely a few typos left in the source. The opening screen has some distortion in the logo and there are probably some more subtle bugs as well. I suspect the foe movement code is buggy because it’s showing strange behavior.</p>
</blockquote>

<p><img src="../../../assets/img/posts/2026-02-25-game-concept/Labyrint.jpg" alt="Labyrint screenshot" />
<em>My Sharp MZ-800 game called “Labyrint” from 1988</em></p>

<p>Honestly, I don’t think the game is much fun to play in its current state. But perhaps, after fixing all typos and maybe some bugs as well, it can be nice to play. I do think that the fence that pops up randomly is a little stupid, it can just drop on your head out of nothing. I might want to tune its behavior to make gameplay a little more fair.</p>

<p>But most importantly, it was so much fun to write and it felt like magic that you could put all this work into a program and then run it and see it come to life on the screen. This feeling never left me.</p>

<p>I actually submitted the game to a HCC MZ-GG programming contest. I ended up winning the 4th prize in the gaming category. Unfortunately, I couldn’t make it to the award ceremony because my parents made me visit my grandmother for her birthday. I was quite disappointed at the time, but at least I got my prize in the mail: a nice, red-labeled cassette tape with public domain software.</p>

<p><img src="../../../assets/img/posts/2026-02-25-game-concept/MZGGPrize.jpg" alt="Cassette tape" />
<em>The HCC MZ-GG cassette tape with public domain software</em></p>

<h2 id="tricks">Tricks</h2>

<p>I remember one trick I learned to save memory. Because the Basic interpreter was loaded into memory (the MZ didn’t have Basic in ROM), you’d quickly run out of memory when typing more than a bit of code. You’d have about 18 KB of memory left for writing code and running it!</p>

<p>The particular Basic interpreter I used (Universal Basic) allowed you to omit spaces in many places that contemporary Basic interpreters didn’t, which was a neat trick to save memory.</p>

<p><img src="../../../assets/img/posts/2026-02-25-game-concept/UniversalBasic4.png" alt="Universal Basic" />
<em>Universal Basic 4.0, eating away most of the available RAM</em></p>

<p>So, for example, instead of</p>

<pre><code class="language-basic">FOR I = 1 TO 10
</code></pre>
<p>you could write</p>
<pre><code class="language-basic">FORI=1TO10
</code></pre>

<p>In retrospect, I think this worked because the interpreter didn’t use bytecode to store the source in RAM (like interpreters on later machines did — for example, GFA Basic on the Atari ST), but instead stored the source code as-is in memory.</p>

<blockquote>
  <p>Storing source code using bytecode isn’t something most modern programming languages do anymore because it has some serious restrictions but I guess it made sense under the memory constraints at the time.</p>
</blockquote>

<p>Something else I remember is that I had this little magazine (probably issued by the HCC MZ-GG but I’m not entirely sure) that showed the bit patterns for byte values 0-255. I didn’t understand binary arithmetic at the time, but I found it really useful to look up the bit values for each byte because I could make sprites that way. I first drew the sprite on graph paper and then translated it to hex values using the table. The Basic interpreter had a command that allowed you to draw a sprite using these hex values.</p>

<p>The table looked something like this:</p>

<p><img src="../../../assets/img/posts/2026-02-25-game-concept/BinaryTable.png" alt="Binary table" /></p>

<p>Another trick I remember was one time, when I was playing with sound on the MZ. I accidentally discovered that you could play a special kind of sound by setting the envelope generator to a really high rate. It sounded a bit off-key but nevertheless <em>special</em>. At lower frequencies it sounded pretty good and not too off-key. I remember showing my trick to people at a Sharp MZ-GG meetup that I went to with my dad (I think in de Jaarbeurshallen in Utrecht). A few years later, with the Atari ST, I learned that this trick was actually a well-known technique called <em>hard sound</em> or <em>hardware sound</em>, most often used for bass sounds called <em>hard bass</em>.</p>

<blockquote>
  <p>If you’re interested in technical details: the MZ had a Texas Instruments <a href="https://en.wikipedia.org/wiki/Texas_Instruments_SN76489">SN76489AN</a> PSG, which is quite similar to the PSG of the Atari ST (a Yamaha <a href="https://en.wikipedia.org/wiki/Yamaha_YM2149">YM-2149</a>, which in turn is actually a General Instrument <a href="https://en.wikipedia.org/wiki/General_Instrument_AY-3-8910">AY-3-8910AY</a>).</p>
</blockquote>

<h2 id="the-atari-st">The Atari ST</h2>

<p>Then, somewhere in 1989, the ST arrived. I already wrote a bit about it in the <a href="/2026/02/20/introduction.html">Introduction</a>, so I won’t repeat all of that here. Suffice to say, it boosted my interest in programming. It offered far more: 1 MB of RAM (vs. 64 KB), a 16/32-bit architecture, a real color palette (the MZ had only 16 fixed colors), and MIDI ports. The sound chip wasn’t a big improvement, however — it was similar to the MZ’s — but I came to love it anyway. The Atari ST also had many great games and demos that made excellent use of the ST’s sound chip; I hadn’t even heard half of what it was capable of.</p>

<p><img src="../../../assets/img/posts/2026-02-25-game-concept/AtariST.jpg" alt="Atari ST 520+" />
<em>My Atari ST in our living room back in 1989</em></p>

<h2 id="games-on-the-st">Games on the ST</h2>

<h4 id="xenon">Xenon</h4>

<p>I now had access to many more games than I had on the MZ, and man, I was so fascinated by them. One of the first games I remember playing on the ST was <a href="https://en.wikipedia.org/wiki/Xenon_(video_game)">Xenon</a> by the legendary <a href="https://en.wikipedia.org/wiki/The_Bitmap_Brothers">The Bitmap Brothers</a>.</p>

<p>Check out this <a href="https://youtu.be/GYbBC19VXnw?t=88">Xenon 1 gameplay video</a>.</p>

<p><img src="../../../assets/img/posts/2026-02-25-game-concept/Xenon.png" alt="Xenon" />
<em>Xenon on the Atari ST</em></p>

<p>While I didn’t have a color monitor until a few years later, I managed to run it using a color emulator. Only a few games worked with the emulator and you had to accept some serious downsides: the frame rate was really low and, to make it not bog down completely, you had to run it in half-width mode, which made the game look even worse. But it was still playable.</p>

<blockquote>
  <p>I don’t know if this was the exact program I used but this one is similar to it: <a href="https://www.atarimania.com/utility-atari-st-omnires_43261.html">Omnires</a>.</p>
</blockquote>

<p>And the music… it was so good! The famous <a href="https://en.wikipedia.org/wiki/David_Whittaker_(video_game_composer)">David Whittaker</a> soundtrack has never left my mind. And that sampled voice at the beginning of the game — “Sector One” — was one of the first samples I’d ever heard come directly from a computer.</p>

<h4 id="xenon-2-megablast">Xenon 2: Megablast</h4>

<p>And then, there was Xenon 2: Megablast. My best friend Roberto (you might remember him from the <a href="/2026/02/20/introduction.html">Introduction</a>) had gotten the <em>Atari ST Action Pack</em> which contained Xenon 2, and we couldn’t believe how much better it looked than the previous edition. The graphics were so much more detailed and refined (drawn by the talented <a href="https://www.mobygames.com/person/801/mark-coleman">Mark Coleman</a>).</p>

<p>Check out this <a href="https://youtu.be/sm8m3o_yE5E?t=106">Xenon 2 gameplay video</a>.</p>

<p><img src="../../../assets/img/posts/2026-02-25-game-concept/Xenon2.png" alt="Xenon 2: Megablast" />
<em>Xenon 2: Megablast on the Atari ST</em></p>

<p>I remember that we’d often play Xenon 2 at his house, where he would control the player ship and I would mash the right mouse button like crazy to shoot. I don’t know if his joystick lacked auto-fire or that this just worked better, it was our way to play together.</p>

<blockquote>
  <p>It is a well-known fact that the right mouse button on the Atari ST is wired to the same input as the fire button of the first joystick, probably to cut costs.</p>
</blockquote>

<h4 id="flying-shark">Flying Shark</h4>

<p>Now, Flying Shark wasn’t a game that excelled in graphics quality or performance, but it still stood its ground as a port of the popular arcade game. It’s a pretty difficult and unforgiving game, but I loved it anyway. The game mechanics are simple but solid.</p>

<p>Check out this <a href="https://youtu.be/soEyCZRpxro?t=10">Flying Shark gameplay video</a>.</p>

<p><img src="../../../assets/img/posts/2026-02-25-game-concept/FlyingShark.png" alt="Flying Shark" />
<em>Flying Shark on the Atari ST</em></p>

<h4 id="lethal-xcess">Lethal Xcess</h4>

<p>Well, Lethal Xcess (aka Wings of Death II) is a bit of a special game. Graphically, it’s not the best-looking game but it definitely sits above average in that respect. Gameplay-wise, it’s also not the most exciting game, mainly because it is extremely difficult and it doesn’t have very interesting game mechanics. But <a href="http://www.edv-rudolf.de/lethal-xcess/tech.htm">technically</a>? Boy oh boy. It was written by demoscene members and it shows. It has a large scrolling playfield with a resolution of 320x256 pixels, for which the creators had to open up the vertical borders. It also uses sync scrolling, which allows for larger playfields and smoother scrolling. All in all it was a very impressive technical achievement for the Atari ST.</p>

<p>Check out this <a href="https://youtu.be/T36Awn0iysM?t=136">Lethal Xcess gameplay video</a>.</p>

<p><img src="../../../assets/img/posts/2026-02-25-game-concept/LethalXcess.png" alt="Lethal Xcess" />
<em>Lethal Xcess on the Atari ST</em></p>

<h4 id="endless-list">Endless list</h4>

<p>I could go on and on to talk about many more great games that I liked, but I have to stop somewhere.</p>

<p>It probably hasn’t gone unnoticed that all of these games are vertically-scrolling shoot ‘em ups. Although I had quite a lot of games I liked a lot that were from other genres, I definitely had a taste for vertically-scrolling shoot ‘em ups and you probably can guess what genre the game I’m working on is in.</p>

<h2 id="basic-programming-on-the-st">Basic programming on the ST</h2>

<p>But before we get to that, let me tell you a bit about how I got into programming on the ST. You already know that I had experience with Basic programming on the MZ and it was a no-brainer to start with <a href="https://en.wikipedia.org/wiki/GFA_BASIC">GFA Basic</a> on the ST, which was the de-facto standard Basic for the ST. It was a lot better than Atari ST Basic (I think I hardly even tried that one) and there were good books about it as well.</p>

<p>At first, I spent most time writing graphics drawing programs, which was a lot of fun. I still didn’t have a color monitor so I could only use high resolution (640x400). I also wrote a few simple games.</p>

<p>Once I had the color monitor, Roberto and I started working on a game called “Dr. Woody”. Sadly, we never finished it.</p>

<p><img src="../../../assets/img/posts/2026-02-25-game-concept/DrWoody1.jpg" alt="Dr. Woody screenshot" />
<em>Our (unfinished) game called “Dr. Woody”</em></p>

<p><img src="../../../assets/img/posts/2026-02-25-game-concept/DrWoody2.jpg" alt="Dr. Woody sprites" />
<em>Dr. Woody sprite sheet</em></p>

<h2 id="demoscene">Demoscene</h2>

<p>At some point, Roberto and I got in touch with the demoscene. I don’t really remember how but we must have met some scene people at a Atari ST meetup or something.</p>

<p>We quickly came up with a name for our little group: “CCC”, which stood for “Crazy Coding Crew”. Soon, we changed it to <a href="https://demozoo.org/groups/39460">Odyssey</a> (this was the name under which we released the <a href="https://www.youtube.com/watch?v=iIZj_vKWhTk">Symbiosis</a> guest screen for the <a href="https://demozoo.org/productions/72345">Synergy Megademo</a>). Later, we settled with <a href="https://demozoo.org/groups/31189">Dawn</a> (or “Dawn MultiMedia”, which was a sign of the times).</p>

<p>Our aliases also changed over time; I went from “Fix” and “Vulture” to <a href="https://demozoo.org/sceners/51055">Zeme</a> and Roberto went from “Digital Coolness” to <a href="https://demozoo.org/sceners/31182">ManTra</a>.</p>

<p>We went to a few notable parties, but I mentioned that in the <a href="/2026/02/20/introduction.html">Introduction</a> already.</p>

<blockquote>
  <p>Today, Roberto and I are still in close touch with some of the demoscene people we met back then: <a href="https://demozoo.org/sceners/2423">Wingleader</a>, <a href="https://demozoo.org/sceners/2415">BoNuS</a> and <a href="https://demozoo.org/sceners/31979">Rapido</a>. We regularly meet up and they’re also in the loop concerning the game I’m working on, providing invaluable contributions, feedback and support.</p>
</blockquote>

<h2 id="assembly-programming-on-the-st">Assembly programming on the ST</h2>

<p>Well, you know, if you have the potential to learn assembly programming and you’ve had a taste of the demoscene, the math is clear: you have to learn assembly programming. So I did. I never got extremely good at it but I could write some pretty decent code.</p>

<p>In the light of that, let me tell you a bit about the development of <a href="https://www.youtube.com/watch?v=iIZj_vKWhTk">Symbiosis</a>.</p>

<h3 id="symbiosis">Symbiosis</h3>

<p>The idea for this demo screen came from a rain effect I had recently coded.</p>

<p><img src="../../../assets/img/posts/2026-02-25-game-concept/Rain.png" alt="Rain effect" />
<em>The rain effect in the Symbiosis demo screen</em></p>

<p>Although it was not a groundbreaking effect, it had such a nice cinematographic atmosphere.</p>

<p>I had wanted to do something with 3D balls for a while and I finally took the plunge. I went to the local library (because, you know, the internet wasn’t a thing yet) and I found a book about 3D graphics programming. I learned how to do 3D transformations and projections and I managed to transform it into assembly code.</p>

<blockquote>
  <p>I later learned that I could have done matrix transformations instead of doing the transformations separately, which would have been more efficient. But I didn’t know that at the time.</p>
</blockquote>

<p>Now that I had the transformations working, I was able to display 3D objects constructed from small sphere-shaped sprites. I used only 2 bitplanes and used a specific palette so that I could draw the sprites without masking (using <code class="language-plaintext highlighter-rouge">OR</code> instructions only) to save precious CPU cycles.</p>

<p>I then wrote a small scripting system where I could specify when to transition to the next object (I used morphing for that), the timing of the subtitles, the color of the object, etc.</p>

<p><img src="../../../assets/img/posts/2026-02-25-game-concept/Object.png" alt="Symbiosis object" />
<em>A 3D object in the Symbiosis demo screen</em></p>

<p>Many of the objects themselves were typed directly into assembly code using <code class="language-plaintext highlighter-rouge">dc.w</code> directives. This means those 3D coordinates were all made up on the spot.</p>

<div class="language-m68k highlighter-rouge"><div class="highlight"><pre class="highlight"><code>    <span class="kt">dc</span><span class="nd">.w </span><span class="mi">0</span><span class="p">,</span><span class="mi">0</span><span class="p">,</span><span class="mi">0</span>
    <span class="kt">dc</span><span class="nd">.w </span><span class="mi">1</span><span class="p">,</span><span class="mi">10</span><span class="p">,</span><span class="mi">0</span>
    <span class="kt">dc</span><span class="nd">.w </span><span class="mi">2</span><span class="p">,</span><span class="mi">20</span><span class="p">,</span><span class="mi">0</span>
    <span class="kt">dc</span><span class="nd">.w </span><span class="mi">3</span><span class="p">,</span><span class="mi">30</span><span class="p">,</span><span class="mi">0</span>
    <span class="kt">dc</span><span class="nd">.w </span><span class="mi">4</span><span class="p">,</span><span class="mi">40</span><span class="p">,</span><span class="mi">0</span>
    <span class="kt">dc</span><span class="nd">.w </span><span class="mi">6</span><span class="p">,</span><span class="mi">50</span><span class="p">,</span><span class="mi">0</span>
    <span class="kt">dc</span><span class="nd">.w </span><span class="mi">8</span><span class="p">,</span><span class="mi">60</span><span class="p">,</span><span class="mi">0</span>
    <span class="p">...</span>
</code></pre></div></div>

<p>Some of the objects were generated using a small GFA program I wrote, mainly because of the relatively complicated animation or shape. One example is the running man:</p>

<p><img src="../../../assets/img/posts/2026-02-25-game-concept/RunningMan.png" alt="Running man" />
<em>The running man in the Symbiosis demo screen</em></p>

<p>Roberto then went to draw these cool logo screens and they really finished off the demo screen nicely. And of course, the music by <a href="https://demozoo.org/sceners/12060">Scavenger</a> was the cherry on top.</p>

<p><img src="../../../assets/img/posts/2026-02-20-introduction/Odyssey.png" alt="Odyssey logo" />
<em>The Odyssey logo</em></p>

<p><img src="../../../assets/img/posts/2026-02-20-introduction/Symbiosis.png" alt="Symbiosis logo" />
<em>The Symbiosis logo</em></p>

<blockquote>
  <p>Something we only realized much later, when the demo was long finished and released, was that the graphics were a bit too dark. This was caused by my monitor, which was set too bright and Roberto used it to do a lot of the drawing on. We’re thinking of doing a remaster version somewhere in the future so who knows, we’ll finally fix the issue then.</p>
</blockquote>

<h2 id="one-more-anecdote">One more anecdote</h2>

<p>There’s one last anecdote I want to share before I get into the game concept.</p>

<p>At some point, I got a sample cartridge for the ST and I wrote a little pitch shifter routine in assembly, which allowed me to talk into a microphone and hear my voice back at a higher pitch (Chipmunk style).</p>

<blockquote>
  <p>I called my grandfather over the phone, having taped the microphone and a pair of headphones to the telephone, and I talked to him in that high-pitched voice. He got really confused and didn’t get what was going on but I had so much fun!</p>
</blockquote>

<h2 id="the-new-game">The new game</h2>

<p><strong>So I guess it’s finally time to talk about the vertically-scrolling shoot ‘em up I’m working on.</strong></p>

<p>I have been working on it for 9 months now and I’m really, really excited about it. You have to be a bit crazy and really passionate about something like this to spend so much time on it. Not only am I 9 months in, but also pretty intensively so, meaning that I spent over 1000 hours already, to give you a sense of scale.</p>

<p>Besides all of the predictable elements that a game from this genre typically has, there are a few unique features that set the game apart. I’ll post about them later, mainly because this part is still a work in progress. But let me say that there will probably be some Metroidvania elements in the game that hopefully will make it much more interesting and fun to play.</p>

<p>Visually, the game sports a large scrolling playfield with a resolution of approximately 320x256 pixels, much like <a href="https://en.wikipedia.org/wiki/Lethal_Xcess">Lethal Xcess</a> has. The game also uses sync scrolling, which allows for larger playfields and smoother scrolling and/or more sprites.</p>

<p>I’m targeting 25 frames per second (2 VBLs). This gives a smooth gameplay experience compared to most Atari ST games, but I’ll have to see if I can maintain it during development. At some point I might have to decide between lowering the frame rate to add more content or keeping the current rate.</p>

<p><strong>But that’s just technical stuff.</strong> The most important thing is that the game is <em>fun to play</em> and will make you want to keep playing, right? That’s what I’m aiming for and it’s definitely not an afterthought. But I assure you that good looks, sound and features will be there as well.</p>

<h2 id="state-of-the-game">State of the game</h2>

<p>To give you a sense of where the game is at, I have a pretty good prototype running, with most of the technical features working:</p>

<ul>
  <li>Scrolling, tile-based playfield</li>
  <li>Player ship with basic movement and shooting</li>
  <li>Collision detection</li>
  <li>Loot, including weapon upgrades and health pickups</li>
  <li>Enemies, enemy projectiles, and attack waves</li>
  <li>Background music and sound effects</li>
</ul>

<p>This means you can already play a bit of the game; there’s a level with enemies, loot, and music. It’s pretty fun to play already, and it looks relatively polished if I may say so.</p>

<p>I’ve drawn most of the graphics myself, but I’m teaming up with Roberto now. I feel the game deserves the best and I’m really happy he agreed to collaborate.</p>

<p>The music is all my work, but I’m open to collaborating with other composers as well.</p>

<p>There are still many missing features, however, such as:</p>

<ul>
  <li>Checkpoints</li>
  <li>Level progression system</li>
  <li>Boss fights</li>
  <li>More enemy types and attack patterns</li>
  <li>More weapons and power-ups</li>
  <li>More levels and accompanying graphics</li>
  <li>More music</li>
</ul>

<p>So while the game is definitely not finished yet, it’s in a good state and I’m happy with the progress so far.</p>

<h2 id="target-platform">Target platform</h2>

<p>This may not be the most exciting paragraph but it has to be mentioned to manage expectations: I’m targeting the Atari ST with 1 MB of RAM. The game will run from a single floppy disk or a hard drive (in the latter case, more memory is required).</p>

<p>The main reason for this is that it’s what I had back in the day, and I want to stay true to the experience it gave me back then.</p>

<p>The game will run on an STE as well, but I’m not yet planning to implement support for the extra features of the STE, such as the blitter or the extra colors.</p>

<p>There will probably be no support for later machines like the Falcon or the TT, because the game heavily relies on specific hardware timings of the ST. But I haven’t ruled it out completely yet, so who knows.</p>

<p>I know that by targeting the basic ST, I’m making it harder to achieve some of my goals but this entire project is all about the challenge and the fun of working within the constraints of the hardware anyway. Otherwise, I could just make a game for modern PCs.</p>

<h2 id="future-plans">Future plans</h2>

<p>Of course I’ll make a public announcement about the game at some point, but I’m not yet sure when — hopefully sometime this year.</p>

<p>Oh, and before I forget: I’m planning a physical release in a custom box with a printed manual, distributed on either a floppy disk or a USB stick.</p>

<h2 id="wrapping-up">Wrapping up</h2>

<p>I hope this gives you a good idea of what the game is about and what to expect. I’m not ready for full disclosure yet, but I’ll be sharing more details in future posts and I will also dive into a lot of the technical details, so stay tuned! I really want to share much more (honestly, it’s quite difficult to hold back with all this enthusiasm), but I have to be sensible about it, because I don’t want to spoil the fun and leave some room for surprises when the game is finally released.</p>

<h2 id="up-next">Up next</h2>

<p>Continue reading with the next post: <a href="/2026/02/27/technical-design.html">Technical design</a></p>

<h4 id="footnotes">Footnotes</h4>

<div class="footnotes" role="doc-endnotes">
  <ol>
    <li id="fn:1" role="doc-endnote">
      <p>HCC stands for “Hobby Computer Club”, which is a Dutch computer club that has been around since the 1970s. The MZ-GG stands for “MZ Gebruikers Groep”, which is a subgroup of the HCC that focused on the Sharp MZ computers. <a href="#fnref:1" class="reversefootnote" role="doc-backlink">&#8617;</a></p>
    </li>
  </ol>
</div>]]></content><author><name>Sandor Drieënhuizen aka Zeme/Dawn</name></author><summary type="html"><![CDATA[Bear with me — this is going to be a relatively long one. Before I get into the details of the Atari ST game I’m developing, I want to give you a good idea of what the game is about, why I’m developing it, and why I’m so excited about it. Some history needs to be told first.]]></summary></entry><entry><title type="html">AI statement</title><link href="http://blog.subspace.nl/2026/02/22/ai-statement.html" rel="alternate" type="text/html" title="AI statement" /><published>2026-02-22T00:00:00+00:00</published><updated>2026-02-22T00:00:00+00:00</updated><id>http://blog.subspace.nl/2026/02/22/ai-statement</id><content type="html" xml:base="http://blog.subspace.nl/2026/02/22/ai-statement.html"><![CDATA[<p>In light of all the current buzz about AI, I wanted to make a short statement about it, if only because some of you might wonder about the extent to which I’m using AI while building the game and writing this blog.</p>

<h2 id="what-am-i-using-ai-for">What <strong>am</strong> I using AI for?</h2>

<ul>
  <li>I <strong>am</strong> using AI to check the grammar of my texts.</li>
  <li>I <strong>am</strong> using AI to help me find bugs or issues in my code.</li>
  <li>I <strong>am</strong> using AI to help me find potential optimizations in my code.</li>
  <li>I <strong>am</strong> using AI to generate small fragments of auto-completed code (e.g., small loops).</li>
  <li>I <strong>am</strong> using AI to generate scripts <sup id="fnref:1" role="doc-noteref"><a href="#fn:1" class="footnote" rel="footnote">1</a></sup>.</li>
  <li>I <strong>am</strong> using AI to help me reason about complex problems.</li>
</ul>

<h2 id="what-am-i-not-using-ai-for">What am I <strong>not</strong> using AI for?</h2>

<ul>
  <li>I am <strong>not</strong> using AI to write entire paragraphs of text.</li>
  <li>I am <strong>not</strong> using AI to write entire sections of code.</li>
  <li>I am <strong>not</strong> using AI to generate any creative content <sup id="fnref:2" role="doc-noteref"><a href="#fn:2" class="footnote" rel="footnote">2</a></sup>.</li>
</ul>

<h2 id="why">Why?</h2>

<p>I think that AI (LLMs in particular) is a great invention but also one that is broadly misunderstood. Like with any advanced technology, some understanding is required to be able to properly judge it, and LLMs are not easy to understand on a technical level.</p>

<p>Let me make a one-time exception to my rule of not writing entire paragraphs of text and ask Copilot to write a short explanation of how LLMs work:</p>

<blockquote>
  <p>At a basic level, LLMs are just a very powerful autocomplete system. They are trained on a large amount of data and learn to predict the next word in a sentence based on the previous words. This is why they can generate coherent and fluent text, but it also means that they don’t have any understanding of the world or the meaning of the words they are generating.</p>
</blockquote>

<p>One particular problem with this is that users are often presented with output that sounds very confident and convincing while it may be completely wrong. If the user then corrects the LLM, it often accepts the correction without any question, even if the correction is actually wrong. The LLM simply has no means of properly judging the quality of its output.</p>

<p>If you’re not an expert in a particular topic, it can be very difficult to judge the quality of the output and you might end up trusting it too much.</p>

<p>I do think that AI can be very helpful, however. But more often, it has sent me onto the wrong track, so I have to be careful about when to employ it; otherwise, I lose more time than I gain. But admittedly, it has helped me find a few very nasty bugs in my code over time, so there’s definitely some value in it.</p>

<p>Finally, let’s talk about AI-generated creative content. While I was impressed at first, I now often have strong uncanny feelings whenever I see AI-generated content. I’m not sure where this is going, but I think human creativity cannot and should not be replaced by AI, unless it wasn’t creative in the first place. This leaves the question of what creativity actually is, but that’s a topic for another day.</p>

<h2 id="up-next">Up next</h2>

<p>Continue reading with the next post: <a href="/2026/02/25/game-concept.html">Game concept</a></p>

<h4 id="footnotes">Footnotes</h4>

<div class="footnotes" role="doc-endnotes">
  <ol>
    <li id="fn:1" role="doc-endnote">
      <p>Examples of scripts are: build scripts, deployment scripts, and configuration files. <a href="#fnref:1" class="reversefootnote" role="doc-backlink">&#8617;</a></p>
    </li>
    <li id="fn:2" role="doc-endnote">
      <p>Examples of creative content are: graphics, music, narrative, and level design. <a href="#fnref:2" class="reversefootnote" role="doc-backlink">&#8617;</a></p>
    </li>
  </ol>
</div>]]></content><author><name>Sandor Drieënhuizen aka Zeme/Dawn</name></author><summary type="html"><![CDATA[In light of all the current buzz about AI, I wanted to make a short statement about it, if only because some of you might wonder about the extent to which I’m using AI while building the game and writing this blog.]]></summary></entry><entry><title type="html">Introduction</title><link href="http://blog.subspace.nl/2026/02/20/introduction.html" rel="alternate" type="text/html" title="Introduction" /><published>2026-02-20T00:00:00+00:00</published><updated>2026-02-20T00:00:00+00:00</updated><id>http://blog.subspace.nl/2026/02/20/introduction</id><content type="html" xml:base="http://blog.subspace.nl/2026/02/20/introduction.html"><![CDATA[<p>I’ve been working on a new 2D pixel-art vertical shoot ‘em up for the Atari ST for nine months now, and I decided it was finally time to blog about it.</p>

<h2 id="personal-history">Personal history</h2>

<p>Let’s start with a bit of personal history from the late 80s and early 90s. When I was a 13-year-old kid, my dad bought me an Atari ST 520+ (which had 1MB of RAM, as the ‘+’ sign designates) and a monochrome monitor (SM124) — thanks, Dad. I’m still grateful; you changed my life!</p>

<p>His primary motivation was the ST’s MIDI capabilities, since I already had a MIDI-compatible synthesizer. I had a lot of fun with it and did quite a lot of MIDI sequencing with Cubase.</p>

<p>Of course, I was also interested in games, but most games required a color monitor, which I didn’t have. I did play some games on the monochrome monitor, but most ‘serious’ games didn’t support it. It wasn’t until a few years later that I got a color monitor and could finally play the games I wanted to play.</p>

<p>When I got the ST, I already had a few years of experience with Basic programming on my trusty 8-bit Sharp MZ-800. Naturally, I started writing GFA-Basic programs on the ST.</p>

<p>My best friend Roberto, who turned out to have an incredible talent for pixel art drawing and music composition, bought an ST as well and soon we started making stuff together.</p>

<p>One of our fields of interest was game development. Like many kids (I presume), we dreamt of making our own games. We made some attempts at writing games in Basic/STOS, but we quickly realized that the performance of Basic was not good enough for the kind of games we wanted to make. Still, it was great fun and also a very educational process.</p>

<p>Some of the games we were particularly inspired by were the shoot ‘em up games like Xenon I and Xenon II. I knew I had to learn assembly programming to achieve the performance we needed for a game similar to Xenon, but it took a year or two before I finally started learning it. One other motivation was that we wanted to start making demos.</p>

<p><img src="../../../assets/img/posts/2026-02-20-introduction/Crew.jpg" alt="Crew" />
<em>Roberto (rear) and I (front) playing Starglider 2 sometime around 1990</em></p>

<p>Later, we visited a few notable demo parties, among them a Sentry party in Breda, the Netherlands, and Fried Bits in Bremen, Germany. We made some great friends in the scene, some of whom we still keep in touch with today.</p>

<p><img src="../../../assets/img/posts/2026-02-20-introduction/SentryPartyBreda.jpg" alt="Sentry party" />
<em>I (black t-shirt, center, standing) and Roberto (white t-shirt, center, standing) at a Sentry party around 1992</em></p>

<p>We used a few crew names over the years and we were also prone to changing our names, but at one point our crew name was Odyssey and we called ourselves Vulture (me) and Digital Coolness (Roberto).</p>

<p><img src="../../../assets/img/posts/2026-02-20-introduction/Odyssey.png" alt="Odyssey logo" />
<em>The Odyssey logo</em></p>

<p>This ultimately culminated in us creating the <a href="https://demozoo.org/productions/169405">Symbiosis guest screen</a> (<a href="https://www.youtube.com/watch?v=iIZj_vKWhTk">YouTube video</a>) for the famous <a href="https://demozoo.org/productions/72345">Synergy Megademo</a>. We’re still proud of this screen and very honored to have been asked by the Synergy people to contribute to their megademo, which is one of the most famous Atari ST demos of all time. The code and graphics were all done by us, the fabulous music was composed by Scavenger from Synergy.</p>

<figure class="video">
	<iframe width="744" height="450" src="https://www.youtube.com/embed/iIZj_vKWhTk" title="Symbiosis guest screen" frameborder="0" allow="accelerometer; autoplay; clipboard-write; encrypted-media; gyroscope; picture-in-picture" allowfullscreen=""></iframe>
</figure>

<p>Later, we changed our crew name to Dawn and our names to Zeme (I) and ManTra (Roberto), and we still use those names today.</p>

<h2 id="the-game">The game</h2>

<p>Although we never got to finish a full game, the dream of making a game remained…</p>

<p>Let’s fast-forward to the (near) present. In May 2025, I couldn’t hold back anymore, now that I had finally managed to get hold of a proper m68k cross-compiler setup on my PC, thanks to <a href="https://tho-otto.de/crossmint.php">Thorsten Otto’s m68k-atari-mint cross-tools</a>.</p>

<p>I had been working on some small projects a few years earlier, using a native C compiler in an Atari ST emulator, but I have to say that it is a real pain to work that way, especially when you are used to modern development environments. I have a lot of respect for those who work that way, but I really prefer working on my PC and then testing the game in an emulator.</p>

<p>So, I got to work and started writing the game. At the time of writing, roughly nine months later, the game is in pretty decent shape, and most technical features are working well. What’s mainly missing is content.</p>

<p>I’m not ready to reveal all the details or what it looks (or sounds) like yet, but I will be sharing some interesting details now and then.</p>

<h2 id="this-blog">This blog</h2>

<p>Because I’ve had to jump through quite a few hoops so far, I wanted to share some of the things I learned. In this blog, you can expect a few posts to appear in the coming months, covering technical details of the game, as well as the design process and the creative process in general. I will also share some of the challenges I faced and how I overcame them, as well as some of the things I wish I had known when I started.</p>

<p>If at any time you want to contact me, check the social links in the footer. Or leave a comment below!</p>

<h2 id="up-next">Up next</h2>

<p>Continue reading with the next post: <a href="/2026/02/22/ai-statement.html">AI Statement</a></p>]]></content><author><name>Sandor Drieënhuizen aka Zeme/Dawn</name></author><summary type="html"><![CDATA[I’ve been working on a new 2D pixel-art vertical shoot ‘em up for the Atari ST for nine months now, and I decided it was finally time to blog about it.]]></summary></entry></feed>